Hi ,
 My house is currently full with small little lego part, as my son is now into the lego phase, which is fun, because lego has much more figures and themes compared to the variety I had as a kid. It realy develops the kids coordination and if a kid is into it , it helps build his patience too.
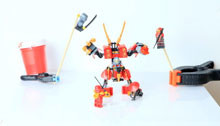
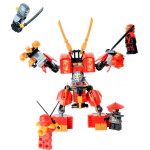
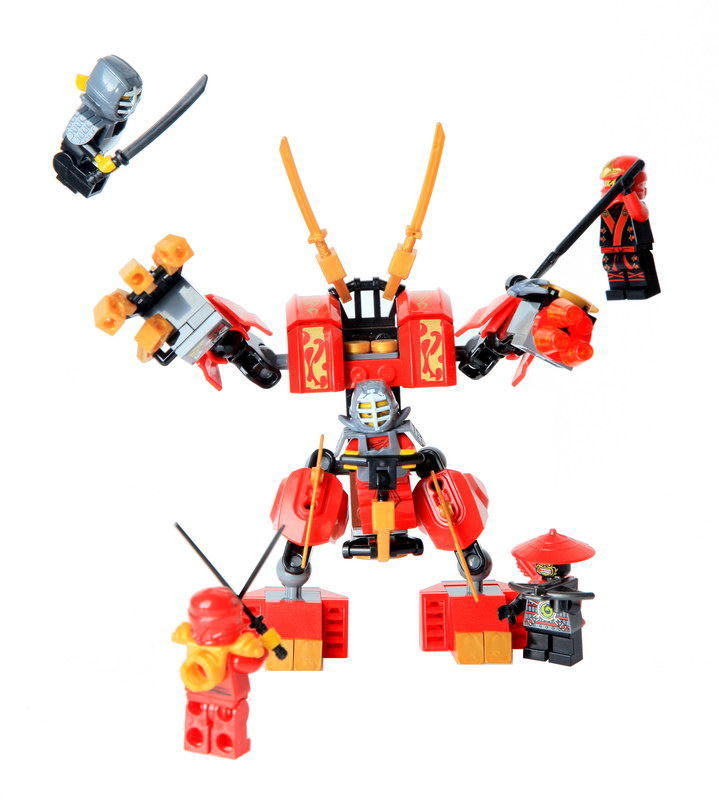
As holidays are over now, we (me and my boy`-) ) got some Lego ninjago packs as presents and we spent some quality time together putting them together, as someone said, you don’t exactly know who got the present me or my boy. One day after noon we decided to setup a photography scene in which some ninja lego fighters fight a big ninja robot (or whatever) ,so lets see how it goes.
Miniature Lego photography setup + Behind the secens
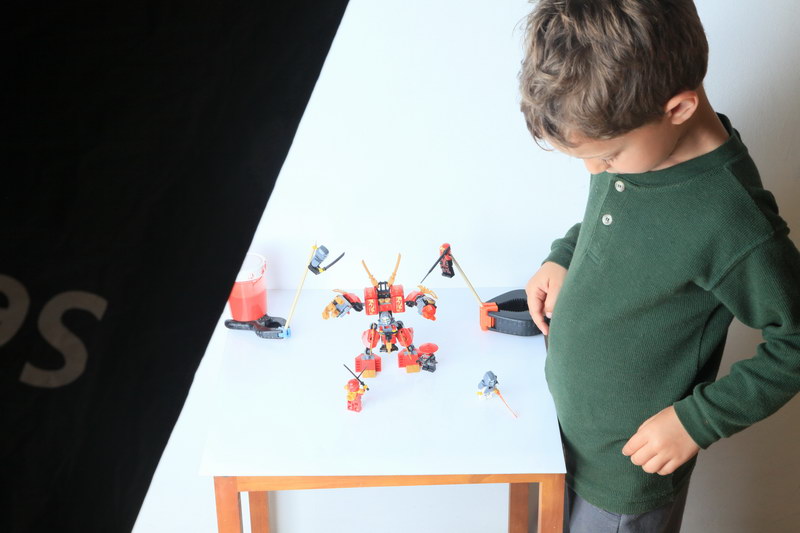
Eitan was in charge for the creative, it was very funny to see him building the scenario, I only had to help him putting the “flying” ninjas together, lets see how we did it together:
- The Lego Setup – Eitan built the scenario. I helped him putting the flying ningas. We used some skewers to “lift” the ninjas up, one end of the skewer held the lego miniature’s hand and the other end of the skewer attached with a spring clamp. Those spring clamps are great use for those kind of tasks , I even used the big clamp as a DIY flash clamp holder (tut + howto can be found here).
- Lighting – only one light used here – the YN560III is a great pick for the job. You can adjust its power as you wish, I used it at 1/2 full power cause I set the aperture to f/13. YN560III put into a 60*90 umbrella softbox, I payed for the softbox about 25$ and its a huge worth of your money.
- Photoshop – This is the time consuming part of this project. improving levels (Ctrl+L in PS) and color is easy, but removing the skewers is what takes time. I not a photoshop artists, but managed to do it… Keep in mind that it takes some time to do it right…
Lego Miniature photography setp by step behind the scenes:


What can I improve for my second attempt at Lego photography?
- If you have any tips, I’ll be happy to hear about it.
- Using a white bristol background and not getting so lazzy and using just a white perspex and the wall behind it…`-)
- Using colored backgrounds.
- Saving the final result in PSD and changin the backgroud from white to some scene.


Thanks for rhe tips,
Kids Summer vacation is about to start, this might be a good activity for them.