Chapter 1: The Essence of Lighting in Photography
Unlocking the Visual Symphony
In the realm of photography, light is not merely a tool; it is the brush that paints our visual stories, crafting shadows, highlights, and colors into a cohesive symphony of visual expression. It is the silent narrator that whispers tales of the unseen, unspoken, and untouched, guiding the observer’s eye through the canvas of our photographic artwork.
The Emotional Conductor
Lighting, in its various forms and temperatures, serves as an emotional conductor, silently weaving through the threads of mood and sentiment. A soft, diffused light might whisper tales of gentleness and calm, while stark shadows and high-contrast lighting might echo stories of mystery and drama. Understanding the emotional undertones that different lighting conditions can convey allows photographers to sculpt the narrative of their images, guiding the viewer through the intended emotional journey.
Sculpting the Subject
Beyond emotion, light meticulously sculpts our subjects, carving out dimensions, textures, and depths. It reveals the gentle curves, stark edges, and subtle textures, defining the physicality of the objects within the frame. The direction, quality, and color of light play pivotal roles in how the subject is perceived, influencing its visual weight, prominence, and impact within the composition.
Crafting the Atmosphere
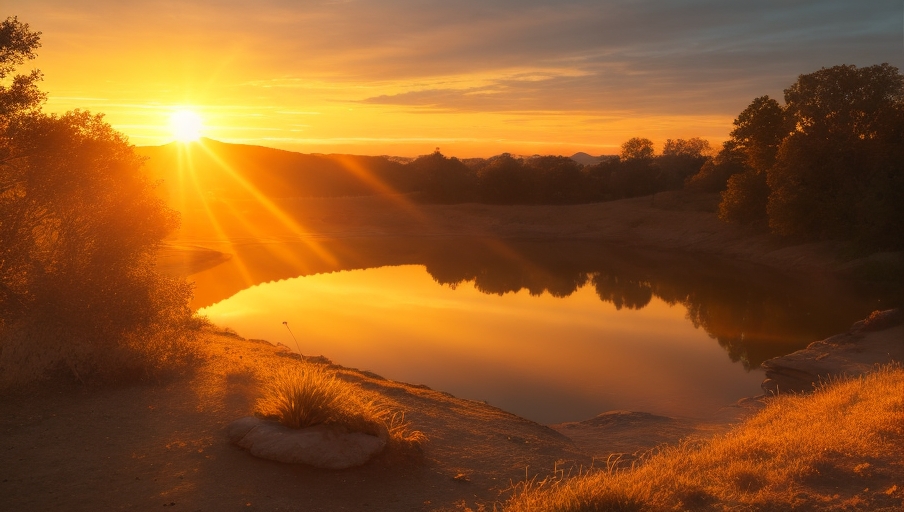
The atmosphere within a photograph, the ambient essence that envelops the viewer, is significantly influenced by the prevailing lighting conditions. Be it the golden embrace of a sunset or the cool, ethereal glow of moonlight, lighting conditions dictate the atmospheric tone of the image. It determines whether a scene feels warm and inviting or cold and distant, guiding the thematic undertones of the photographic piece.
The Dance of Shadows and Highlights
In the delicate balance of light and dark, shadows and highlights dance in a perpetual tango, each defining the other. Shadows, cast by the obstruction of light, add depth and perspective, providing a three-dimensional quality to images. Highlights, on the other hand, draw attention, spotlighting areas of importance and illuminating details. The interplay between shadows and highlights is where photographers find the rhythm to compose their visual melody.
Conclusion
As we delve deeper into the world of photography, recognizing and respecting the profound influence of lighting becomes paramount. It is through this understanding that photographers can begin to master the art of visual storytelling, manipulating light to sculpt their subjects, craft atmospheres, and convey emotions. The journey ahead will illuminate various lighting setups and techniques, each with its unique narrative capabilities and aesthetic impacts.
In the subsequent chapters, we will explore various lighting setups, their practical applications, and the stories they tell. Stay tuned as we illuminate the path towards mastering the art of lighting in photography.
Chapter 2: Natural vs. Artificial Lighting
Embracing the Sun: The Art of Natural Lighting
Natural lighting, generously provided by the sun, offers photographers a dynamic and versatile light source that can be both a gentle whisper and a powerful roar within an image. The character of natural light evolves throughout the day, morphing from the soft, golden hues of sunrise to the harsh, direct light of midday, and finally into the warm, elongated shadows of the golden hour.
Golden Hour Glory: The golden hour, occurring shortly after sunrise and before sunset, bathes the world in a warm, diffused light, reducing harsh shadows and enriching colors.

Midday Challenges: The midday sun, while bright and vibrant, introduces challenges with harsh shadows and overexposed highlights, demanding strategic use of shadows and reflections.
Utilizing Weather: Overcast days provide a natural diffuser, creating soft, even lighting, while stormy skies can introduce a dramatic, moody atmosphere to images.
Crafting Light: The Science of Artificial Lighting
Artificial lighting allows photographers to craft light in a controlled and precise manner, manipulating shadows, highlights, color temperature, and direction to achieve the desired effect. From the softbox’s gentle diffusion to the pinpoint precision of a snoot, artificial lighting tools empower photographers to create their desired lighting conditions, independent of time and weather.
Flash and Continuous Lights: Understanding the differences and applications of flash and continuous lighting, exploring their respective strengths and weaknesses in various photographic scenarios.
Modifiers Magic: Light modifiers, such as softboxes, umbrellas, and reflectors, allow photographers to control and shape light, softening shadows, directing highlights, and managing light spill.
Color Gels:Introducing color gels to manipulate the color temperature of artificial lights, crafting atmospheres, and introducing creative color concepts into images.
Harmonizing Natural and Artificial Light
Marrying the worlds of natural and artificial light opens up a realm of creative possibilities, allowing photographers to complement available light with crafted light, achieving a balanced and visually harmonious image.
Fill Flash Techniques: Utilizing flash to fill in shadows created by natural light, providing additional detail and reducing contrast.
Balancing Color Temperatures: Managing the differing color temperatures of natural and artificial light to achieve a consistent and balanced color palette across the image.
Creating Depth: Employing artificial lights to introduce additional layers of depth and dimension within a naturally lit scene, spotlighting details, and crafting shadows.
Conclusion
Whether basking in the sun’s natural glow or crafting light with precision using artificial sources, understanding the characteristics, advantages, and challenges of both natural and artificial lighting is pivotal in creating visually compelling images. As we journey forward, we will delve deeper into various lighting setups, exploring how to manipulate and master light in all its forms.
—
In the chapters ahead, we will illuminate the path towards understanding and implementing various lighting setups, each with its unique narrative and aesthetic capabilities. Stay tuned as we continue to explore the fascinating world of lighting in photography.
Chapter 3: Basic Lighting Setups for Beginners
Illuminating the Path: An Introduction to Lighting Setups
Embarking on the journey of understanding lighting setups invites photographers to explore the myriad ways in which light can be manipulated to sculpt, highlight, and shadow their subjects. For beginners, grasping the basics of a few fundamental lighting setups provides a sturdy foundation upon which to build and experiment with more complex lighting scenarios in the future.
1. Flat Lighting: Simplicity and Clarity
Definition: Flat lighting minimizes shadows, providing an even, clear light across the subject.
Application: Ideal for portraits and product photography where clarity and detail are paramount.
Technique: Position the light source directly in front of the subject, ensuring that light is evenly distributed.
2. Rembrandt Lighting: Classic and Dramatic
Definition: Characterized by a small, triangular light on the subject’s opposite cheek, creating a dramatic interplay of light and shadow.
Application: Widely used in portrait photography to add depth and a classic aesthetic.
Technique: Place the light source at a 45-degree angle and slightly above the subject’s face, casting a shadow from the nose that connects with the shadow of the cheek.
3. Backlighting: Ethereal and Dreamy
Definition: The light source is positioned behind the subject, creating a halo or silhouette effect.
Application: Effective for creating mood in portraits, nature photography, and to emphasize shapes and outlines.
Technique: Ensure the light source is directly behind the subject, and adjust exposure to retain details within the silhouette or create a high-key effect.
4. Side Lighting: Highlighting Texture and Form
Definition: The subject is illuminated from one side, casting shadows and highlighting textures.
Application: Ideal for emphasizing depth, revealing textures, and creating a dramatic effect.
Technique: Position the light source to the side of the subject, playing with angles to manipulate the length and direction of shadows.
5. Butterfly Lighting: Flattering and Elegant
Definition: Recognized by the butterfly-shaped shadow under the nose, providing a flattering light that accentuates cheekbones.
Application: Often used in beauty and portrait photography for a glamorous effect.
Technique: Place the light source above and directly behind the camera, ensuring the light falls directly onto the subject’s face from above.
Navigating Challenges and Adapting Techniques
While these setups provide a basic framework, it’s essential to recognize that every lighting scenario will present its unique challenges and variables. Adapting these setups, modifying angles, and introducing additional light sources or modifiers will allow photographers to navigate through various challenges and achieve the desired lighting effect.
Conclusion
Mastering these fundamental lighting setups equips beginners with the tools to explore, create, and communicate through light, crafting images that resonate and tell a story. As we continue our journey through the world of lighting in photography, we will explore how to manipulate these setups, introduce additional light sources, and utilize modifiers to further shape and control light.
—
In the upcoming chapters, we will delve deeper into the world of light modifiers and explore how they can be utilized to further manipulate and control these basic lighting setups. Stay tuned as we continue to illuminate the intricacies of lighting in photography.
Chapter 4: Manipulating Light with Modifiers
Shaping the Ethereal: The Role of Light Modifiers
Light, in its raw form, can be harsh, direct, and unyielding. Light modifiers act as intermediaries, shaping, softening, and directing light to create the desired effect within an image. From the gentle diffusion of a softbox to the direct bounce of a reflector, light modifiers allow photographers to sculpt light with precision, controlling shadows, highlights, and overall tonality.
Softboxes: The Gentle Illuminators
Definition: A softbox diffuses the light source, creating a softer, more even light that minimizes harsh shadows.
Application: Widely used in portrait and product photography to achieve a flattering, gentle light.
Technique: Position the softbox in relation to the subject and light source to control the softness and direction of the light.
Reflectors: Bouncing Brilliance
Definition: Reflectors bounce light onto the subject, filling in shadows and introducing additional light without the need for an extra light source.
Application: Ideal for outdoor photography to utilize natural light and in studio setups to manage shadows.
Technique: Angle the reflector to bounce light into desired areas, adjusting distance and angle to manage intensity and spread.
Umbrellas: Spreading Softness
Definition: Umbrellas spread light across a wider area, creating a soft and evenly distributed light.
Application: Useful in portrait photography and when a broad, soft light is desired.
Technique: Position the umbrella to either reflect light onto the subject or shoot through it, adjusting distance to control light spread.
Snoots: Pinpoint Precision
Definition: A snoot focuses light into a concentrated beam, creating a spotlight effect.
Application: Effective for highlighting specific areas or subjects and creating dramatic lighting effects.
Technique: Align the snoot with the area to be highlighted, adjusting distance and angle to manage the size and intensity of the light spot.
Gels: Painting with Color
Definition: Gels alter the color of light, introducing creative color effects and managing color temperature.
Application: Used to create mood, match ambient light color, or introduce creative color concepts.
Technique: Attach the gel to the light source, ensuring it alters the light color as desired and adjust white balance accordingly.
Grids: Controlling Spill
Definition: Grids focus light and control spill, ensuring light only falls where intended.
Application: Ideal for controlling background lighting and preventing unwanted light spill in the frame.
Technique: Attach the grid to the light source and adjust positioning to ensure light is directed as desired.
Conclusion
Light modifiers are the sculptor’s tools in the art of photography, allowing for the manipulation, control, and creation of light in myriad forms. Understanding and mastering these tools empower photographers to craft light with intention, creating images that resonate with their creative vision and narrative intent.
—
In next chapters , we will explore practical tips and scenarios, applying the knowledge of lighting setups and modifiers to craft images with intention and narrative depth. Stay tuned as we continue to explore the multifaceted world of lighting in photography.
Chapter 5: Practical Tips for Lighting on a Budget
Innovation in Illumination: Budget-Friendly Lighting Solutions
Embarking on a journey through the world of photography doesn’t necessitate a hefty investment in high-end lighting equipment. With a dash of creativity, a sprinkle of innovation, and a basic understanding of light, photographers can create stunning, well-lit images without breaking the bank. This chapter will shine a light on practical, budget-friendly tips and DIY solutions to illuminate your photographic endeavors.
1. DIY Light Modifiers: Crafting Control
Homemade Softbox: Utilize translucent white plastic bags or a white bedsheet to diffuse light, creating a makeshift softbox that softens and spreads light. Read our first ever diy softbox tutorial (the way we did it 10 years ago) 🙂
DIY Reflectors: Employ aluminum foil, white cardboard, or a car sunshade to bounce light onto your subject, filling in shadows and introducing additional illumination.
Handmade Snoot: Construct a snoot using black paper or a cereal box to direct and focus light, creating a spotlight effect on the desired area.
2. Utilizing Ambient Light: Maximizing Available Illumination
Window Light: Harness the soft, diffused light from a window, using it as a natural softbox to illuminate your subject.
Street Lights: Explore the urban jungle and utilize street lights, neon signs, and shop windows to introduce creative, ambient lighting into your night photography.
Vehicle Headlights: Employ the headlights of a vehicle to create dramatic, directional lighting in outdoor, nighttime scenarios.
3. Everyday Items as Creative Lighting Tools
Flashlight Photography: Use a flashlight to paint with light in long-exposure photography, or as a focused light source in low-light scenarios.
Fairy Lights: Introduce fairy lights to create bokeh, add ambient light, or craft creative lighting effects within your images.
Candlelight: Utilize the soft, warm glow of candles to create intimate, moody lighting in your photographs.
4. Adapting to Natural Light Conditions
Shadow Play: Explore the use of shadows created by natural light, using them to add depth, texture, and interest to your images.
Reflective Surfaces: Utilize reflective surfaces like water, mirrors, and glass to bounce natural light, illuminating shadows and adding highlights.
Diffusing Harsh Sunlight: Employ a translucent white umbrella or a diffuser to soften harsh sunlight, creating a more even, flattering light.
5. Smartphone Lighting: A Pocket-Sized Solution
Smartphone Flash: Use the flash on your smartphone as a fill light, to light paint, or as a primary light source in macro photography.
Phone Screen Light: Utilize the light from your smartphone screen to create soft, ambient light, perfect for illuminating close-up subjects.
Conclusion
Photography, at its core, is an art form, and art thrives on creativity and innovation. By exploring and experimenting with available light sources and crafting your own DIY lighting solutions, you can create visually stunning, well-lit images that resonate with your creative vision, all while maintaining a budget-friendly approach.
—
As we conclude our journey through the basics of lighting in photography, remember that the true mastery of light comes from exploration, experimentation, and understanding. Illuminate your path with knowledge, and let creativity light the way.


