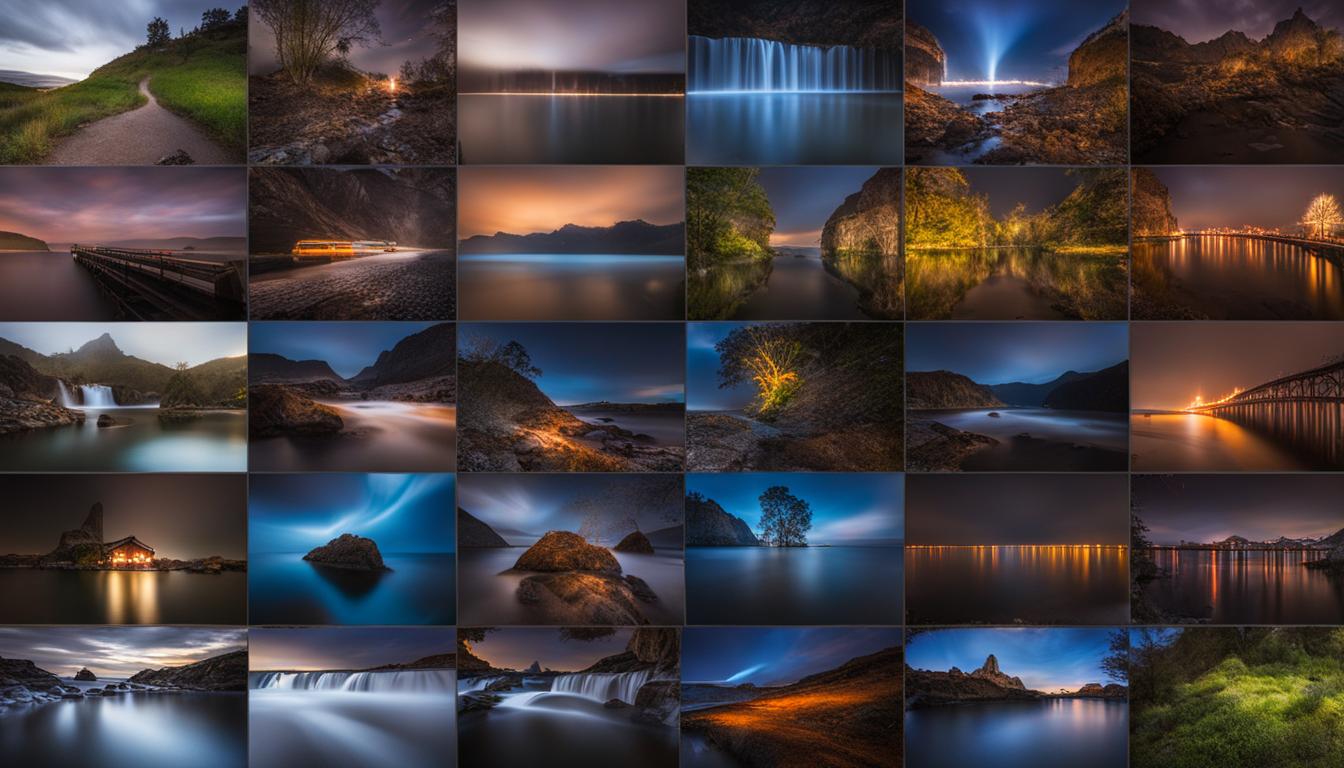
If you’re fascinated by the dreamy, flowing effects of long exposure photography, this guide is for you! In this section, we will share crucial tips for creating beautiful long exposure shots, including our comprehensive Long Exposure Photography Checklist. Whether you’re a beginner or an expert, this guide will help you perfect your craft and create stunning, mesmerizing images that capture a moment in time.
Key Takeaways:
- The Long Exposure Photography Checklist is an essential tool for capturing breathtaking long exposure shots.
- Proper planning, equipment, camera settings, composition, and focus techniques are crucial for successful long exposure photography.
- Practice, experimentation, and patience are key to mastering the art of long exposure photography.
Understanding Long Exposure Photography
Long exposure photography involves maintaining an open shutter for a prolonged period to capture stationary objects’ sharpness, while the movements in the frame are blurred.
The optimal camera settings for capturing long exposure shots depend on different factors such as light conditions, camera type, lens, and personal preferences.
It is essential to set the camera according to the lighting conditions to achieve the desired outcome. For instance, in low light conditions, the aperture must be low, and the shutter speed should be slow to enable more light to enter the camera.
On the other hand, high shutter speeds result in sharp, frozen moments, while slow shutter speeds create interesting dynamic effects by light trails. Camera settings for long exposure shots may vary depending on the situation, but a good starting point is to use the camera’s aperture priority mode.
Experimenting with different camera settings and techniques such as using neutral density filters, exposure times, and bulb mode can further enhance long exposure photography results.
Aperture
The aperture significantly affects long exposure shots as it directly impacts the depth of field. A small aperture, such as f/8 or f/11, is recommended for capturing sharpness from foreground to background.
Shutter Speed
The shutter speed is the most critical setting for long exposure photography. It determines the exposure time and affects the amount of light captured. A longer exposure time allows more light to enter the camera, resulting in more blurred motion and light trails.
ISO
The ISO controls the camera’s sensitivity to light. A lower ISO results in less noise in the image, which is desirable for long exposure shots because they have a higher risk of producing noise in the image due to the longer exposure time.
Bulb Mode
Bulb mode is a camera setting that allows the shutter to remain open for as long as you hold down the shutter release button manually. Bulb mode is useful for long exposure shots that require exposure times of more than 30 seconds.
By understanding the basics of long exposure photography and selecting the optimal camera settings, you can capture stunning long exposure shots.
Choosing the Right Equipment
The quality of your long exposure shots is dependent on the equipment you choose. When it comes to cameras, there is no one-size-fits-all solution. Consider the type of photography you plan on doing, your budget, and your skill level. We recommend investing in a DSLR or mirrorless camera with manual controls for optimal flexibility.
Next, you’ll need to choose the right lenses for your desired effect. Wide-angle lenses are ideal for capturing expansive landscapes, while telephoto lenses are better suited for isolating subjects or compressing distance.
To achieve the desired effect in your images, you’ll need to use filters. Neutral density filters reduce the amount of light that enters the camera, allowing for longer exposure times. Graduated neutral density filters are ideal for balancing exposure when shooting landscapes that have a bright sky and dark foreground.
Finally, to ensure your long exposure shots are sharp and steady, invest in a quality tripod. A sturdy tripod is essential, especially for exposures longer than a few seconds. The tripod for long exposure photography should have a ball head that allows you to make precise adjustments, and rubber feet for added stability.
Recommended Equipment:
- DSLR or mirrorless camera with manual controls
- Wide-angle or telephoto lenses
- Neutral density filters
- Graduated neutral density filters
- A sturdy tripod with a ball head and rubber feet
Tip: When choosing equipment, consider renting before making a purchase. This will help you determine what gear is right for your photography needs without committing to a big expense.
Planning Your Shot
Long exposure photography requires careful planning to achieve desired results. Choosing the right locations and considering weather conditions can affect the look and feel of the final image.
Location is Crucial
Scout out locations with interesting elements such as water, clouds, or moving objects like cars or people to create stunning long exposure shots. A beach with waves crashing against rocks or a city street with bustling cars can make for great subjects. Check online forums, social media groups or photo sharing sites to discover long exposure photography locations near you.
Pro Tip: Before heading out, confirm if any permits are required for photography in specific locations. Be mindful of any safety concerns and follow park and property rules.
Consider Weather Conditions
Weather can be an important consideration in capturing stunning long exposure shots. Clouds in the sky can create an eye-catching effect, and the movement of clouds or water can be enhanced depending on wind speed. Experiment with different weather conditions to see what works best for your desired effect.
Pro Tip: Check weather forecasts and try to plan your shoot around the weather conditions. Overcast days can be ideal for those dreamy, mist-like effects, while clear nights could show beautiful star trails in the sky.
Now that you know how important planning is for long exposure photography, explore the different locations and weather conditions to discover your own unique style. Next, let’s move on to the camera settings and techniques you’ll need to capture those perfect long exposure shots.
Setting Up Your Camera
Properly setting up your camera is essential for achieving optimal long exposure results. To start, adjust the aperture to a high f-number, such as f/11 or f/16, to increase depth of field and maintain sharpness throughout the image.
Next, set your ISO to the lowest possible value to reduce noise, typically between ISO 100-200. This will help prevent grainy-looking photos and ensure clear, sharp shots.
When it comes to shutter speed, there is no one-size-fits-all formula, as it will depend on the lighting conditions and desired effects. However, a good starting point is around 30 seconds for nighttime shots and 1/60 or 1/30 for low-light conditions. If you need a longer exposure, consider using the bulb mode or adding neutral density filters to reduce the amount of light entering the camera.
Lastly, using long exposure photography techniques such as bracketing can help you achieve a range of exposures to choose from in post-processing. This technique involves taking multiple shots at different exposure levels, allowing you to select the best result for your final image.

Remember to experiment with different settings and techniques to find what works best for your style and the specific shot you are capturing. Happy shooting!
Mastering Composition in Long Exposure Photography
Creating stunning long exposure images involves more than just adjusting your camera’s settings. Composition plays a critical role in capturing visually appealing shots that engage your audience.
Utilizing leading lines is a fantastic way to lead your audience’s eyes to the main subject of your image. Look for natural lines, such as the curvature of a bridge, to create a sense of depth and dimension in your shot.
In addition to leading lines, incorporating different elements in your shot creates interest and depth. Play around with different angles and perspectives, but also keep in mind the overall balance of your image.
“The focus of composition is to create an engaging and thought-provoking image that tells a story,” says renowned long exposure photographer, John Batdorff.
Experimenting with different perspectives, such as low angles or aerial shots, can create a unique and captivating image. However, it’s important to remember that every element in your shot should serve a purpose and contribute to the story you are trying to tell.
Overall, mastering composition in long exposure photography takes practice and experimentation. Utilize leading lines, incorporate different elements, and play around with different perspectives. Soon enough, you’ll have a collection of captivating long exposure images that engage your audience and tell a compelling story.
Focusing and Exposure Techniques
Achieving accurate focus and exposure is essential for successful long exposure photography. When shooting long exposure photography, manual focus is often more reliable than autofocus. This is because autofocus can struggle to find focus points in low light conditions and may cause blurry or out-of-focus shots. Instead, try using Live View, magnify the image, and manually focus to ensure sharpness.
Another essential technique in long exposure photography is exposure bracketing. It involves taking three or more shots at different exposures, including the correct exposure, one that is overexposed, and one that is underexposed. This technique can help capture a range of exposures, so you have the flexibility to choose the best result in post-processing.
When exposure bracketing, it’s essential to use a tripod to maintain the same composition. Also, set your camera to continuous shooting mode and use the self-timer or a remote trigger to reduce camera shake.
Using Exposure Bracketing
- Set up your camera to Aperture Priority mode or Manual mode.
- Enable exposure bracketing in your camera’s settings.
- Take three or more shots at different exposures – one at the correct exposure, one overexposed, and one underexposed.
- Adjust the exposure compensation settings to your desired range.
- Ensure you are using a tripod to minimize camera shake.
Incorporating these focusing and exposure techniques will help you create stunning long exposure shots. Practice and experiment with different settings and elements, and remember to use the Long Exposure Photography Checklist to perfect your craft.
Conclusion
Congrats on making it to the end of our long exposure photography guide! Armed with our comprehensive checklist and tips, you are now well-equipped to capture stunning long exposure shots.
Remember to plan your shots carefully and choose the right equipment, including a sturdy tripod. Setting up your camera correctly is crucial, and don’t forget to experiment with composition to create visually appealing images.
With practice and patience, you can master the art of long exposure photography and create captivating images that will impress your audience. So get out there and start shooting, and don’t forget to have fun!


