Hi, This time I want to introduse you to Arnasphoto, he took a relly good biker image while using readly budget gear, only ony YN560III (the YN560III reviewed here)
Hi, My name Zulfikar Arna, from small town called Sorowako on the north part of South Sulawesi, Indonesia. I would say thank you very much specially to Moshe Samuel who gave me the the good opportunity to share the information and …….. on his amazing website. Here i will explain the details how to take my pict and how to editing picture in post pro..First my appologize if one of you missunderstood about the language.. (my mother language is bahasa).
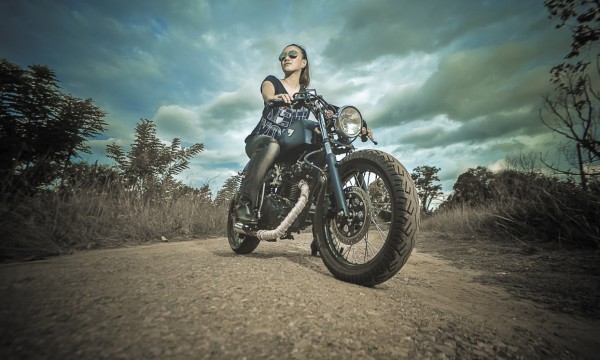
Lets see how the biker photograph taken:
This picture has been taken at the garden near the lake (Matano Lake) not far from where I live, around 17:15.
I used Nikon d700 Nikon Digital Camera in a low angle position. Low angle perspective, will help you enlarge the object you are photographying, in this inmage you can see how the front wheel looks giant , SamyangManual Lens 18-28 at 18mm 1/250sec.F4.0 iso100
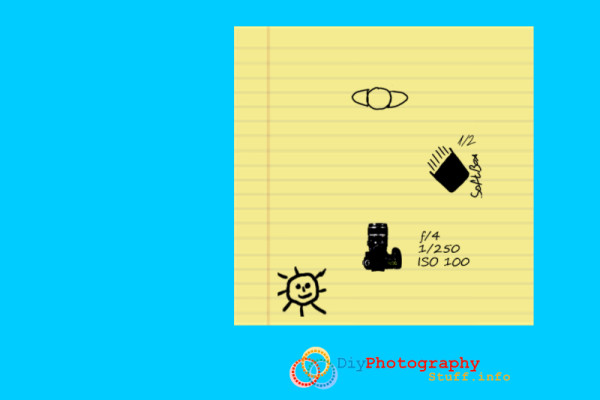
It was a one lighting setup with mini softbox 50x50cm in the left of the model..and lighting flash YN560iii Power ½ zoom 24mm..
This is my Lighting Setup
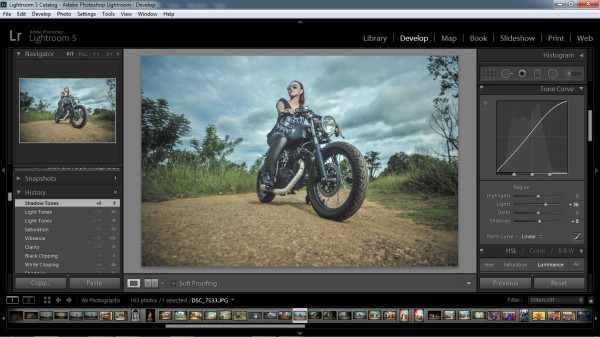
The Biker Photography Post Production
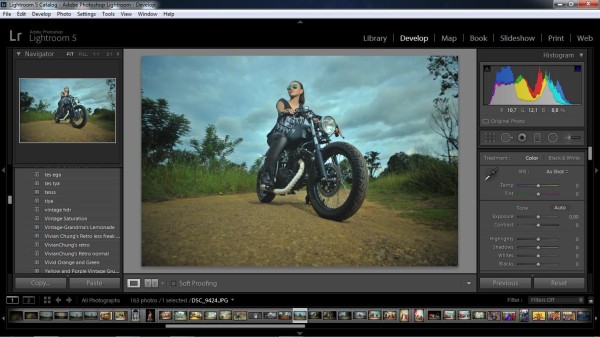
1st step. Import photo into Lightroom 5th.
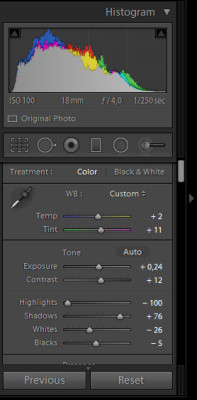
2nd step.
Raise the temperature to +2 and Tint to +11 ( check picture on the left side). Follow the setting inctruction. To get the dramatic effect highlights decrease to -100 and shadow increase to +76 so it will be look more brighter.
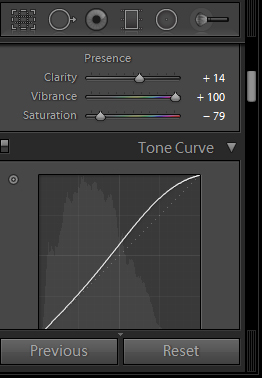
3rd Step
Raise the clarity to +14 and the vibrance up to +100 and suturation increase to -79. (check the picture below).
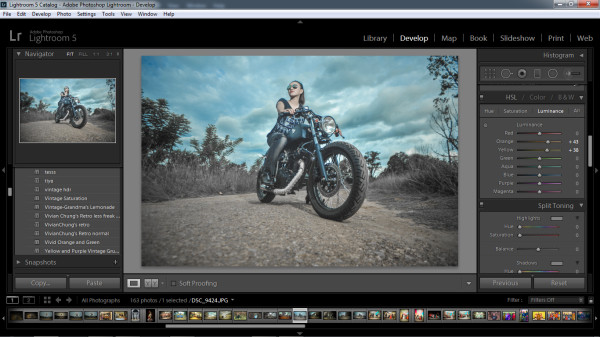
The editing picture it will be shows on this picture below.

4th
Raise the light curve tone tools become +36 and the shadows to +8 ( check the picture below).
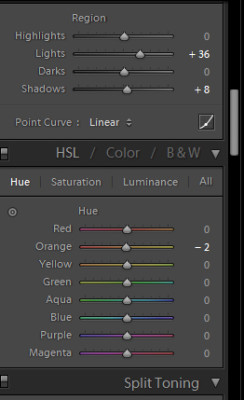
You will see the picture slightly the same with the picture below.
4th step
Here we changed the color. Follow the instruction below to get the saturatuion setting and the luminance.
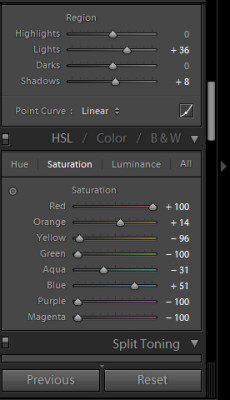
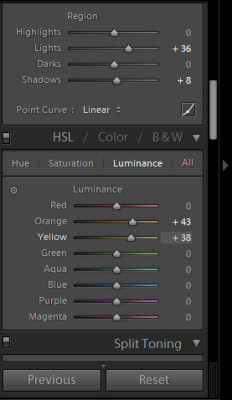
Editing result will be slightly like the picture below.
6th step:
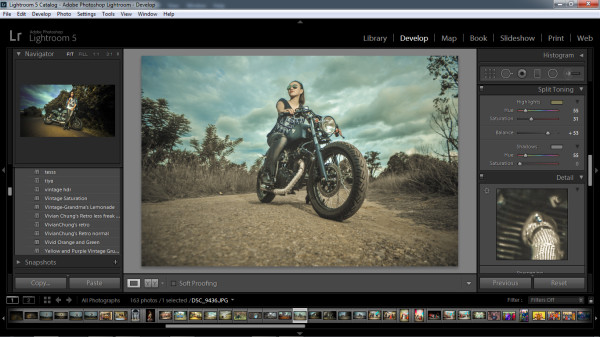
follow the instruction below for split toning.

7th Step
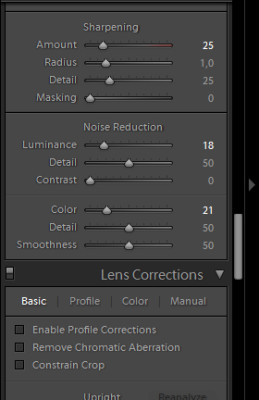
Change the sharpening noise reduction like the picture below:

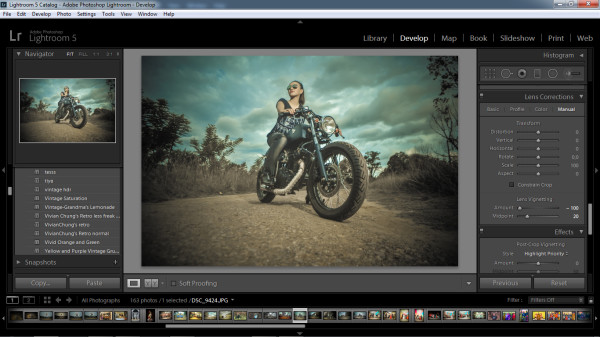
8th Step
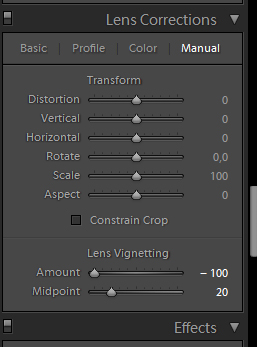
Slightly modifying the image here:
Next, choose lens vignetting tools to bring the vignette around the subject.
Moving on to photoshop:
To edit the picture I’m usually using 2 softwares:
- I normally use LR and to get the bright and clear picture:
- Adope Photosop CS6.
Open Adobe Photoshop CS6 and import the picture
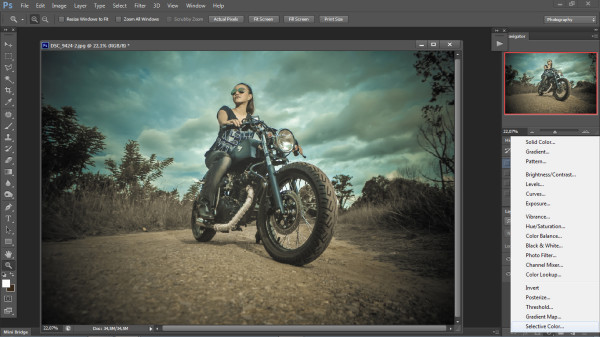
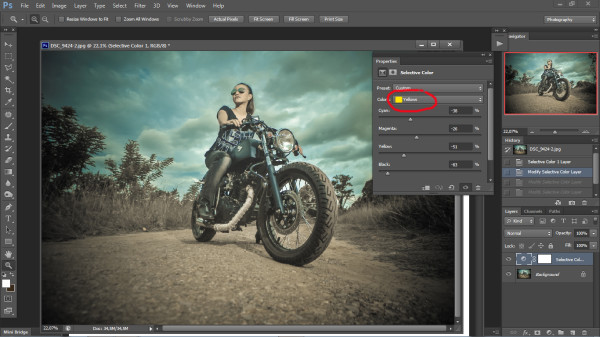
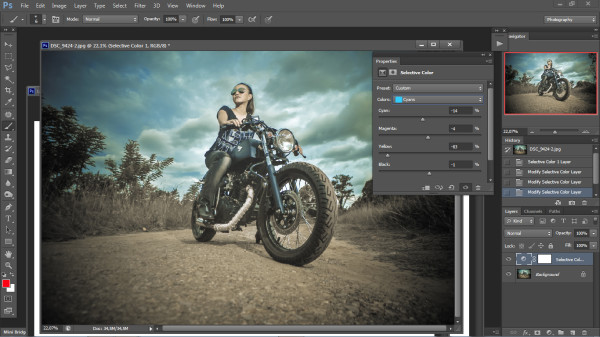
Next, Choose Selective Color Tools+Modify Selective Color “YELLOW” and do the same instruction like the picture below.Cyan -38 ,Magenta -26, Yellow -51, Black -83
Modify Selective Color “White” is to get the white color sky, so it will give more volume like the picture below. Cyan 0, Magenta 0, Yellow -87, Black -64

Modify Selective Colour “CYAN” is to giving the natural colour of the sky which is very similar with the original situation. Cyan -14, Magenta -4, Yellow -83, Black -1
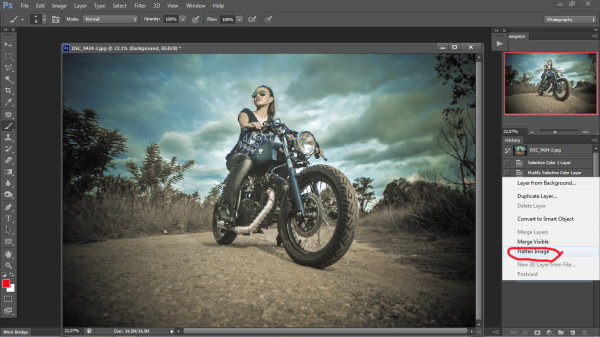
Next,click right on the background layer and choose flatten image to joining both layer.
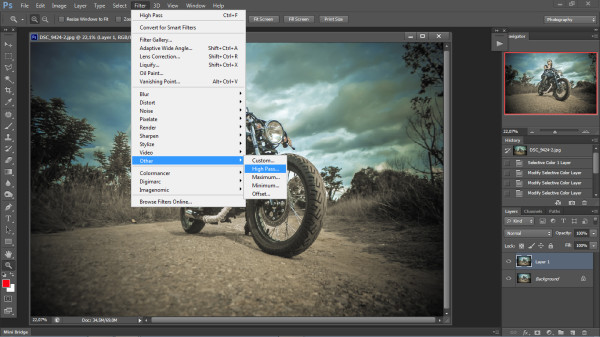
Then CTRL+J to make new layer, choose layer 1 (filter++Other+High Pass).
Radius setting up to 4,8 and set the blending mode to Overlay.
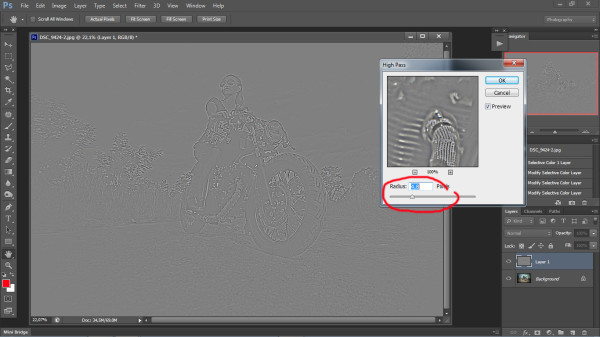
Then, Set Set blending mode to Overlay. The picture will be shows up below:

Step 9:
Next, Click on right side of your mouse on the Layer Background dan choose Flatten Image..
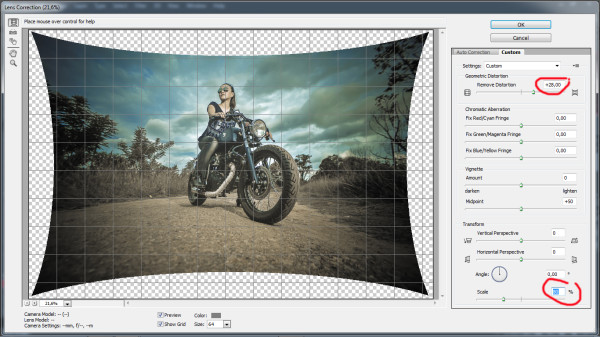
Next Step,Choose Filter+ Lens Correction.. Find custom.

Remove Setting distortion up to +28 and scale to 80%.. Enter Ok.
Choose Crop Tools and do the same as picture below.
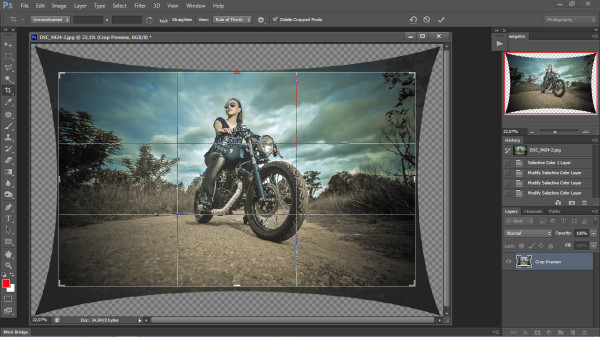
All the result from editing process will be like the picture below: