As an e-commerce business owner, your product photography is one of the most critical aspects of your online store. Captivating product images can make all the difference in converting your website visitors into paying customers. However, achieving beautiful product photos requires careful planning, proper equipment, and essential skills.
In this section, we will provide you with the ultimate product photography checklist, including tips and tricks specifically tailored for e-commerce photography. Whether you’re a beginner or a seasoned pro looking to refine your skills, this guide will help you take high-quality product images that sell.
Key Takeaways:
- Creating captivating product photos is crucial for e-commerce success.
- A checklist and proper planning will help you capture high-quality product images for your online store.
- Equipment selection, planning, lighting, and post-processing are equally important for achieving visually appealing product photos.
- With the right approach and tools, you can create stunning product photos that drive sales and enhance your e-commerce business.
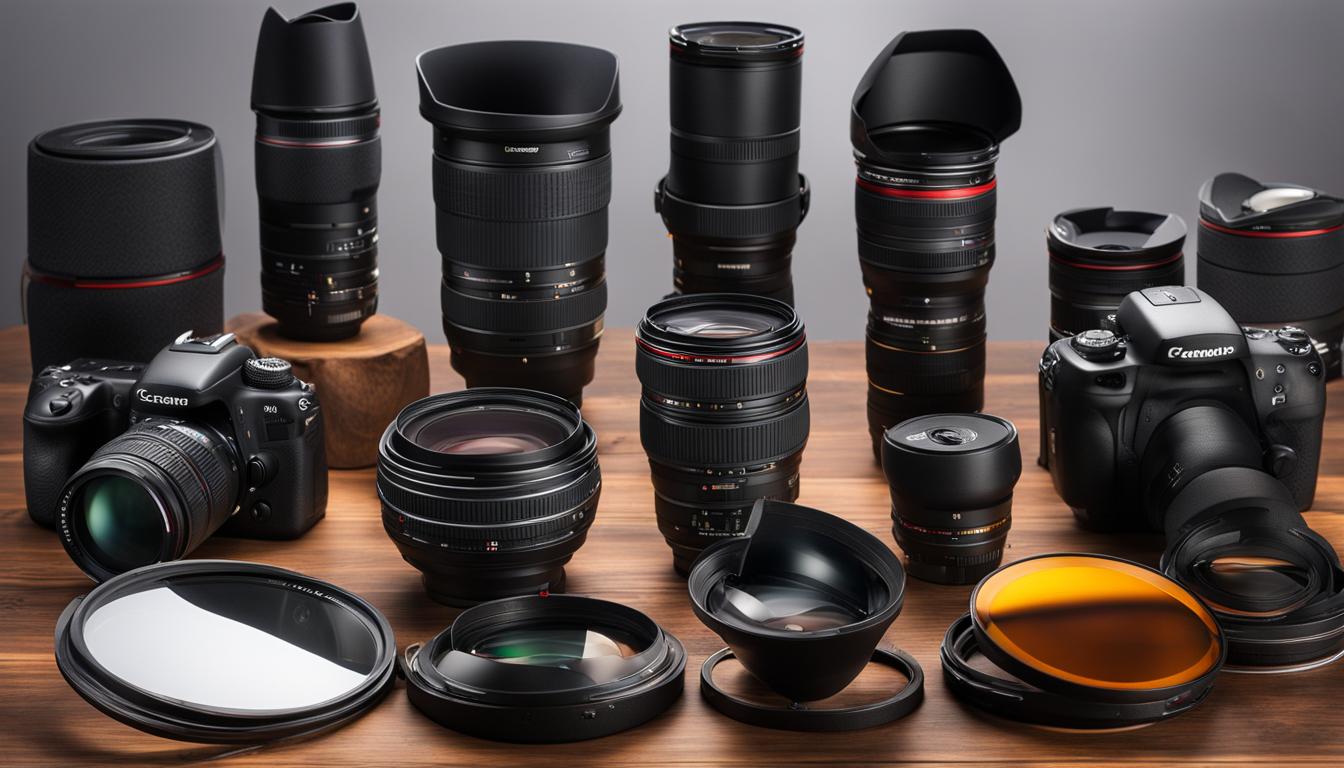
Essential Equipment for Product Photography
Investing in high-quality equipment is essential for capturing stunning product images. Here are the essential equipment you need for product photography:
Camera
A camera with manual control and a high resolution is ideal for product photography. A DSLR or mirrorless camera is a great choice as they provide good image quality and flexibility. Some popular brands for product photography equipment include Canon, Nikon, and Sony.
Lenses
The right lens can make a huge difference in product photography. A macro lens is great for capturing small details, while a zoom lens provides flexibility. Popular lenses for product photography include the Canon EF 100mm f/2.8 Macro, Nikon AF-S VR Micro-NIKKOR 105mm f/2.8G IF-ED, and the Sony FE 90mm f/2.8 Macro G OSS.
Lighting
Lighting is crucial for product photography as it can make or break the final image. Studio lighting equipment such as softboxes, umbrellas, and strobes can help you achieve the perfect lighting conditions for your product images. Alternatively, natural light can also be used effectively.
Tripods and Accessories
Using a tripod can ensure that your camera remains steady and images are sharp. Some additional accessories that can come in handy include a remote shutter release, reflectors, and diffusers.
By selecting the right equipment, you can capture high-quality product images that will showcase your products in the best light possible.
Planning and Preparation for Product Photography
Planning and preparation are essential for producing high-quality product photos that showcase the features and benefits of your products.
Product Styling
Product styling involves carefully selecting the right props and accessories to complement your products. Use props that are relevant to your brand and product line, but don’t overcrowd your images. Remember, the goal is to highlight your products, not distract from them.

Image Composition
Image composition refers to the arrangement of elements within a photograph. Before shooting, consider the framing and angle of your product image. Utilize the rule of thirds to create a balanced and visually appealing composition.
“The rule of thirds is a guideline which proposes that an image should be imagined as divided into nine equal parts by two equally-spaced horizontal lines and two equally-spaced vertical lines, and that important compositional elements should be placed along these lines or their intersections.”
Background Selection
Background selection is an important aspect of product photography that can impact the overall feel of your images. Consider using neutral backgrounds that don’t compete with your products, such as white, gray, or black. Alternatively, you can also use colored backgrounds that complement your product line.
By incorporating these planning and preparation tips into your product photography process, you can create visually stunning images that capture the attention of potential buyers.
Lighting Techniques for Professional Product Photography
Lighting is a crucial element in product photography. It can make or break your shots, so it’s essential to get it right. In this section, we will discuss different lighting techniques and setup options for both studio and natural light photography, helping you create stunning images that showcase your products to the fullest.
Studio Lighting Tips
Studio lighting allows you to have full control over the lighting conditions, which is ideal for product photography. Use softbox or umbrella diffusers to create even lighting and reduce harsh shadows. Another option is to use a ring light, which creates a soft and uniform light ring around the product and creates an attractive catchlight. To avoid color casts, use a gray card or a white balance tool to set the correct color temperature.
Natural Light Photography
Natural light can create stunning results, but it’s important to use it properly. Shoot during the golden hours, which are the first and last hours of sunlight. Indirect sunlight is best, as direct sunlight can create harsh shadows. Use a reflector or a diffuser to control the light and create a softer effect. Avoid mixed lighting conditions, as they can create color casts that are hard to correct in post-processing.
Combining Studio and Natural Light
You can also combine studio and natural light to create an even more striking effect. Use natural light as the main light source and add studio lighting to fill in the shadows. This technique creates a natural and organic feel while still maintaining control over the lighting conditions.
By using these lighting techniques, you can elevate your product photography to the next level. Whether you’re using studio or natural light, understanding how light works and how to manipulate it will help you create the perfect lighting conditions to showcase your products and enhance their visual appeal.
Editing and Post-Processing Tips for Product Photography
Editing and post-processing techniques can make the difference between an average photo and an outstanding one. Whether you’re a beginner or a pro, enhancing your product images with editing software can make them stand out and increase your sales.
Editing Tips
When editing your product images, there are a few basic adjustments you should consider making:
- Adjust the brightness and contrast to make the image stand out
- Crop the image to improve composition and remove unwanted elements
- Correct the color balance to ensure accurate representation of the product
While these are basic adjustments, they can make a significant difference to the final image. Experiment with the settings to find the balance that works best for your product.
Retouching Techniques
Retouching can help remove minor imperfections and enhance the visual appeal of your product images. When retouching, consider the following techniques:
- Remove dust, scratches, and other blemishes
- Smooth out wrinkles and creases
- Remove unwanted objects and distractions
- Make subtle adjustments to the product’s shape to make it look more appealing
However, be careful with retouching, as overdoing it can make the image look unrealistic and unappealing.
Software Recommendations
There are many editing and retouching software options available, but here are some popular ones:
- Adobe Photoshop: a professional-level software used by many photographers and graphic designers for its extensive range of tools and capabilities
- Lightroom: a photo editing software designed specifically for photographers, allowing for easy organization and editing of large amounts of images
- GIMP: a free and open-source software with similar features to Adobe Photoshop
Consider experimenting with different software to find the one that best suits your needs and preferences.
By using editing and post-processing techniques, you can enhance the visual appeal of your product images and make them stand out. Experimenting with different software and techniques is key to finding the perfect balance for your product photography.
Conclusion
Creating stunning product images is essential for any e-commerce business. By following the ultimate product photography checklist, you can capture high-quality images that convert potential buyers into customers.
Remember to choose the right equipment, plan and prepare your product shoots, use proper lighting techniques, and post-process your photos for the perfect finishing touch.
With consistent effort and attention to detail, you can add value to your products and stand out in a crowded online marketplace. Get started today and watch your e-commerce business thrive!


