Welcome to Photography Under the Stars: A Guide to Astrophotography! Are you captivated by the mesmerizing beauty of the night sky? Have you ever wondered how to capture celestial wonders with your camera? If you answered yes, then this guide is for you.
In this comprehensive astrophotography guide, we will explore everything you need to know to unlock the magic of astrophotography. From equipment and camera settings to composition and post-processing techniques, we’ll cover all the essential aspects of capturing the awe-inspiring beauty of the night sky.
Key Takeaways
- Learn how to capture the mesmerizing beauty of the night sky with astrophotography.
- Understand the basic concepts and equipment required for astrophotography.
- Plan your astrophotography shoots using mobile apps and online resources.
- Discover camera settings and techniques to capture the brilliance of the stars.
- Explore the art of composing captivating night sky images.
Getting Started with Astrophotography
Welcome to the captivating world of astrophotography where you’ll discover how to capture the mesmerizing beauty of the night sky. Before diving into the depths of astrophotography, let’s cover the basics by understanding the gear required and essential concepts.
Equipment Required
First things first, you’ll need a camera, preferably a DSLR or mirrorless camera that can shoot in manual mode. An interchangeable lens camera will give you more flexibility and allow you to change lenses based on the type of astrophotography you want to shoot.
A sturdy tripod is essential to keep your camera stable during long exposures. Consider investing in a remote shutter release or intervalometer to minimize camera shake when pressing the shutter button.
Wide-angle lenses with a fast aperture are ideal for astrophotography. The wider the lens, the more of the sky you can capture. A fast aperture, such as f/2.8 or faster, will allow more light into your camera and enable you to use shorter shutter speeds.
Astrophotography Basics
Night sky photography involves capturing the beauty of stars and celestial objects at night. It requires an understanding of aperture, shutter speed, and ISO, which are the three components of the exposure triangle.
Aperture determines the depth of field or how much of the image is in focus. A wider aperture, indicated by a lower f-number, will create a shallow depth of field, and a narrower aperture, indicated by a higher f-number, will create a deeper depth of field.
Shutter speed is the amount of time the camera’s shutter remains open. A longer shutter speed will capture more light but can cause star trails, while a shorter shutter speed will capture less light but produce sharper stars.
ISO is the camera’s sensitivity to light. Higher ISOs will allow you to capture more light but may introduce noise or grain to your images.
Experiment with different combinations of aperture, shutter speed, and ISO to achieve the desired exposure for your astrophotography shots.
“The wider the lens, the more of the sky you can capture. A fast aperture, such as f/2.8 or faster, will allow more light into your camera and enable you to use shorter shutter speeds.”
Planning Your Astrophotography Shoot
Successful astrophotography requires more than just pointing your camera at the sky and pressing the shutter button. Careful planning is crucial to achieving stunning results. In this section, we will guide you through the process of planning your astrophotography shoot.
Finding Dark Sky Locations
To capture the stars at their brightest, you need to find a location with minimal light pollution. Light pollution from cities and towns can significantly reduce the visibility of stars and other celestial objects in the night sky.
One way to find dark sky locations is to use the Dark Sky Finder website. It provides a light pollution map, allowing you to search for areas with minimal light pollution around your location. You can also use mobile apps like SkySafari or Star Walk 2 to help you locate celestial objects and find dark sky locations.
Understanding Moon Phases and Celestial Events
The moon can greatly affect your astrophotography results. A full moon can create too much light, washing out stars and other celestial objects, while a new moon can provide optimal viewing conditions.
It’s also important to be aware of celestial events, such as meteor showers, eclipses, and planetary alignments. These events can provide unique opportunities to capture stunning astrophotographs.
Night Sky Photography Tips
When planning your astrophotography shoot, it’s important to consider the time of year, weather conditions, and the position of the stars. Here are a few tips to help you get started:
- Check the weather forecast to ensure clear skies.
- Choose a location with an unobstructed view of the horizon.
- Use a tripod to keep your camera steady and minimize blurring.
- Invest in a remote shutter release to avoid camera shake when pressing the shutter button.
- Shoot in RAW format to allow for greater flexibility in post-processing.
Capturing the Stars: Camera Settings and Techniques
Capturing stunning astrophotographs requires a careful balance of camera settings and techniques. In this section, we will explore some of the key settings and techniques for capturing the brilliance of the stars and creating stunning images of the night sky.
Camera Settings for Astrophotography
Shooting in manual mode is essential for astrophotography, giving you full control over exposure settings. Here are some essential settings to consider:
| Setting | Recommended Value |
|---|---|
| ISO | 1600-3200 |
| Shutter Speed | 15-30 seconds |
| Aperture | f/2.8 to f/4 for wide-angle lenses, and f/4 to f/5.6 for telephoto lenses |
Keep in mind that these settings may vary depending on your location and the brightness of the stars. Experimenting with different settings and taking test shots can help ensure you capture the best possible image.
Star Photography Techniques
Capturing the stars requires more than just pointing and shooting your camera. Here are some tips to help you create stunning star photographs:
- Use a tripod to prevent camera shake and ensure sharp images.
- Use a remote or cable release to prevent camera shake when pressing the shutter button.
- Use manual focus and focus on infinity.
- Consider using a star tracker or equatorial mount to capture long exposures of the stars without star trails.
Long Exposure Photography
Long exposure photography is an essential technique for capturing the brilliance of the stars and creating stunning night sky images. Here are some tips to help you master long exposure photography:
- Use a shutter speed of at least 15-30 seconds to capture the stars’ movement and create stunning star trails.
- Consider using a neutral density filter to allow for longer exposure times.
- Use a bulb mode to capture exposures longer than 30 seconds.
- Experiment with different shutter speeds to capture the perfect shot.
Composition and Framing for Astrophotography
While capturing stunning celestial bodies is the primary focus of astrophotography, it’s important not to forget about composition and framing when setting up your shots. By incorporating these elements, you can enhance the visual impact of your images and create a more immersive experience for viewers.
The Rule of Thirds
One of the most fundamental principles of composition in photography, the rule of thirds, is just as important in astrophotography. The rule of thirds divides an image into a 3×3 grid, with points of interest positioned along the intersections of the lines. This technique creates a more dynamic visual composition by avoiding a central focus point and instead spreading it across the image.
For example, when photographing the Milky Way, you may want to position the galactic center at one of the intersections of the grid, rather than in the middle of the image. This can add depth and balance to your shot.
Night Sky Framing
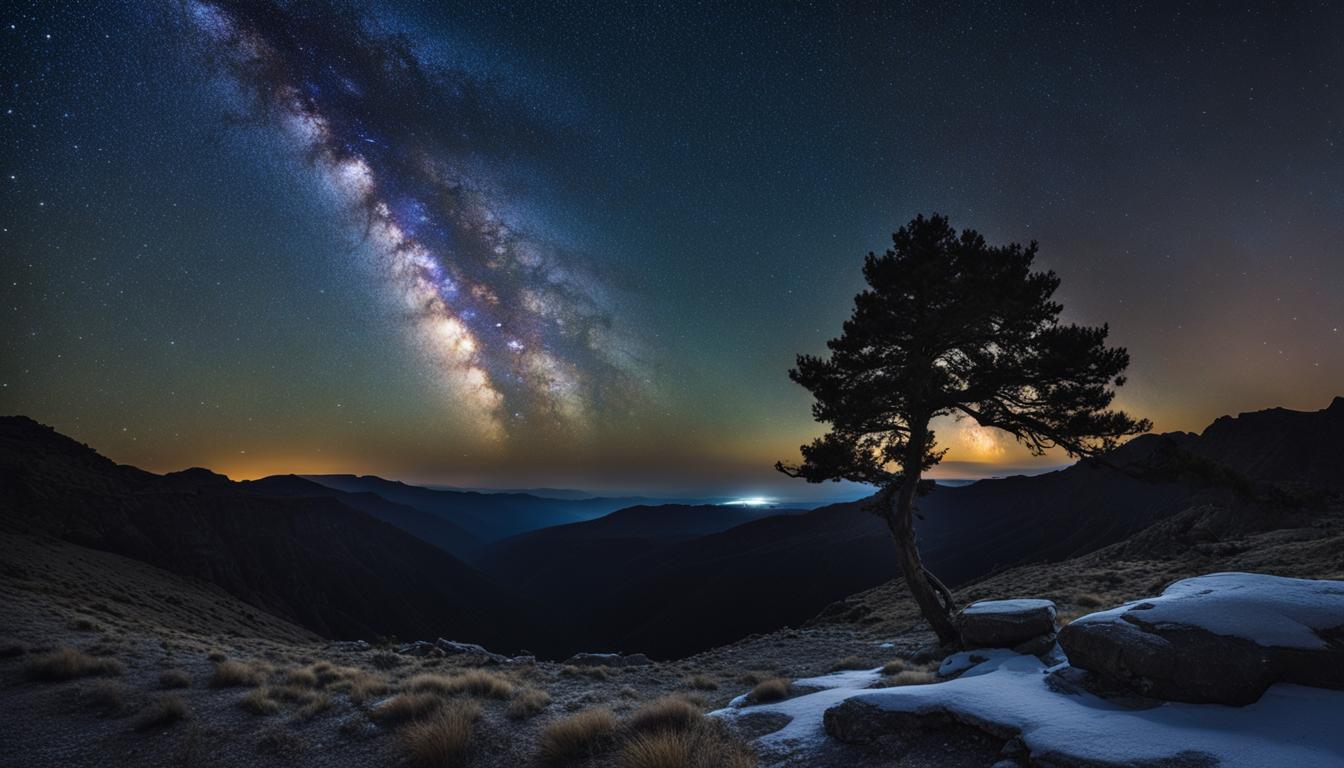
Another consideration is framing. When capturing the night sky, you can use foreground elements to create a sense of depth and scale. By including trees, mountains, or other objects in the foreground, you can give your images a more dramatic and immersive feel. The foreground can also be used to frame the night sky itself, drawing the viewer’s gaze towards the stars.
For instance, you might position a tree or mountain range to one side of your shot, allowing the stars to fill the rest of the frame. This can create a beautiful contrast between the earth and sky, highlighting the beauty of both.
Pro Tip: Remember to bring a flashlight or headlamp to help you see your camera and adjust your settings without disrupting your night vision. You can also use a red filter to minimize the impact of artificial light on your images.
Astrophotography Post-Processing: Bringing Out the Beauty
Once you have captured your stunning night sky images, post-processing is the next step to take your astrophotography to the next level. Post-processing allows you to enhance the beauty of the stars and other celestial objects while correcting any errors or imperfections in your images.
There are various image editing techniques you can use to enhance your astrophotographs. Basic adjustments like contrast, brightness, and saturation can go a long way in improving the visual impact of your images. Additionally, using noise reduction tools like Adobe Lightroom or Photoshop can help to minimize the graininess in your astro images.
One of the most useful techniques for enhancing night sky photos is to adjust the levels and curves of the image. This can be done through software like Adobe Lightroom or Photoshop. By adjusting the levels, you can fine-tune the brightness, contrast, and color balance of your astrophotographs.
You can also use software like Deep Sky Stacker or Sequator to stack multiple images together to create a final image with a higher signal-to-noise ratio. Stacking is especially useful for capturing fainter celestial objects such as galaxies and star clusters.
Remember, the goal of post-processing is to enhance the beauty of your night sky images while keeping them looking natural. Avoid over-processing your images as this can lead to an artificial and unrealistic look.
Advanced Astrophotography Techniques
Once you have mastered the basics of astrophotography, you can take your skills to the next level with advanced techniques. These techniques involve capturing deep sky objects, using star trackers and telescopes, and stacking multiple images to reveal details that are invisible to the naked eye.
Capturing Deep Sky Objects
One of the most exciting aspects of astrophotography is capturing deep sky objects, such as galaxies, nebulae, and star clusters. To capture these objects, you will need a camera that can take long exposures and a telescope or telephoto lens with a high focal length.
When photographing deep sky objects, it’s important to have accurate tracking to avoid star trailing. This can be achieved with a star tracker, which compensates for the Earth’s rotation and keeps the camera fixed on the subject.
Deep sky objects are faint, so you’ll need to use a longer exposure time and higher ISO to capture them. Be prepared to take multiple exposures and stack them in post-processing to bring out the details of the object.
Using Star Trackers and Telescopes
Star trackers and telescopes can help you capture stunning images of the night sky. A star tracker is a device that attaches to your camera and compensates for the Earth’s rotation, allowing you to take longer exposures without star trailing.
A telescope, on the other hand, allows you to capture detailed images of planets, stars, and galaxies. When using a telescope for astrophotography, it’s important to have an adapter that can attach your camera to the telescope.
Keep in mind that using a telescope for astrophotography requires patience and practice. You will need to focus the telescope and align it with the object you want to capture. You may also need to take multiple exposures and stack them in post-processing to enhance the final image.
Stacking Images
Stacking multiple images is a powerful technique for revealing hidden details in your astrophotographs. This technique involves taking multiple exposures of the same subject and combining them in post-processing to create a single, detailed image.
When stacking images, it’s important to use a stable tripod and take multiple exposures of the same subject with the same camera settings. You can then use software such as DeepSkyStacker or Adobe Photoshop to align and stack the images, revealing the details that are invisible to the naked eye.
Troubleshooting Common Astrophotography Challenges
As with any photography genre, astrophotography comes with its own set of challenges. However, with a bit of preparation and knowledge, you can avoid or overcome most of the common issues. In this section, we will guide you through some of the most common astrophotography troubleshooting problems and how to solve them.
Light Pollution
Light pollution is the bane of every astrophotographer’s existence. It manifests as a bright and hazy glow in the sky, rendering the stars and other celestial objects invisible. To counteract this issue, try to head out to dark-sky locations, where light pollution is minimal. You can use various online resources, such as Dark Site Finder, to find suitable locations near you. If that’s not possible, consider using light pollution filters or modifying your camera settings.
Noise Reduction
Noise is an inherent issue in astrophotography, especially when shooting at high ISO values. To reduce the noise, it’s best to shoot multiple images of the same object and stack them later in post-processing. Alternatively, use noise reduction software such as Topaz DeNoise AI or Adobe Lightroom. However, be careful not to overdo it, as it can result in loss of details.
Managing Dew
Dew buildup on your lens or camera can ruin an otherwise perfect shot. To prevent this, use dew heaters, which warm up the lens and camera to prevent moisture from forming. Alternatively, you can use a hairdryer or hand warmer to dry them out.
Dealing with Difficult Weather Conditions
Weather conditions can make or break an astrophotography shoot. Heavy cloud cover, rain, or high winds can all impede your ability to capture a clear night sky. However, don’t give up at the first sign of bad weather. Instead, try to work around it. For instance, use cloudy nights to capture creative light trails or find unique foreground elements.
Conclusion
We hope this guide has been helpful in your journey of discovering the beauty of astrophotography. Remember to always prioritize safety and respect the environment when you go out to shoot.
Keep Practicing to Refine Your Skills
With practice, you’ll become more familiar with your equipment and more comfortable shooting in the dark. Try different settings, compositions, and techniques to develop your own style. Don’t be afraid to experiment!
Share Your Work with the World
Astrophotography is an exciting and rapidly growing genre. Share your work with the world on social media or photography communities to get feedback and connect with other astrophotographers. Don’t forget to credit the location and equipment used!
Explore the Universe
The night sky is a vast canvas waiting to be explored. Keep an open mind and let your curiosity guide you. Who knows what wonders you might discover through your lens next!
FAQ
What is astrophotography?
Astrophotography is the art and technique of capturing images of celestial objects, such as stars, planets, galaxies, and nebulae, using specialized equipment and long exposure photography.
What equipment do I need for astrophotography?
To get started with astrophotography, you will need a DSLR or mirrorless camera, a sturdy tripod, wide-angle lenses with low aperture values, and a remote shutter release or intervalometer.
How can I focus my camera correctly for astrophotography?
For precise focusing in astrophotography, use manual focus mode and set the lens to infinity. Additionally, you can use the Live View mode to zoom in on a bright star or planet to achieve pinpoint focus.
What are the ideal camera settings for astrophotography?
Recommended camera settings for astrophotography include shooting in manual mode, using a high ISO (1600-3200), a wide aperture (f/2.8 or lower), and a long exposure time (15-30 seconds).
How do I reduce noise in my astrophotography images?
To minimize noise in astrophotography, use a lower ISO setting, capture multiple images and stack them using specialized software, and apply noise reduction techniques during post-processing.
How do I find dark sky locations for astrophotography?
To find dark sky locations, use mobile apps like Dark Sky Finder or websites such as DarkSiteFinder.com to locate areas with minimal light pollution. National parks and remote countryside areas are often excellent options.
What is stacking in astrophotography?
Stacking in astrophotography involves combining multiple images of the same celestial object to reduce noise, increase detail, and bring out the hidden features. Specialized software like DeepSkyStacker or Photoshop can be used for the stacking process.
How can I capture the Milky Way in my astrophotography?
To capture the Milky Way, choose a moonless night with little light pollution, find a dark sky location, use a wide-angle lens with a low aperture value, and a long exposure time. Experiment with different camera settings and composition techniques to create stunning images of our galaxy.
What post-processing techniques can I use for astrophotography?
Post-processing techniques for astrophotography include adjusting exposure and white balance, enhancing contrast and color saturation, reducing noise, and selectively sharpening the stars. Software like Adobe Photoshop, Lightroom, or specialized astrophotography software can be used for these adjustments.
How can I capture deep-sky objects in astrophotography?
To capture deep-sky objects, such as nebulae and galaxies, you will need a telescope or a camera lens with a longer focal length, a mount that tracks the celestial objects, and longer exposure times. Specialized cameras like CCD or CMOS cameras are often used for advanced deep-sky astrophotography.


