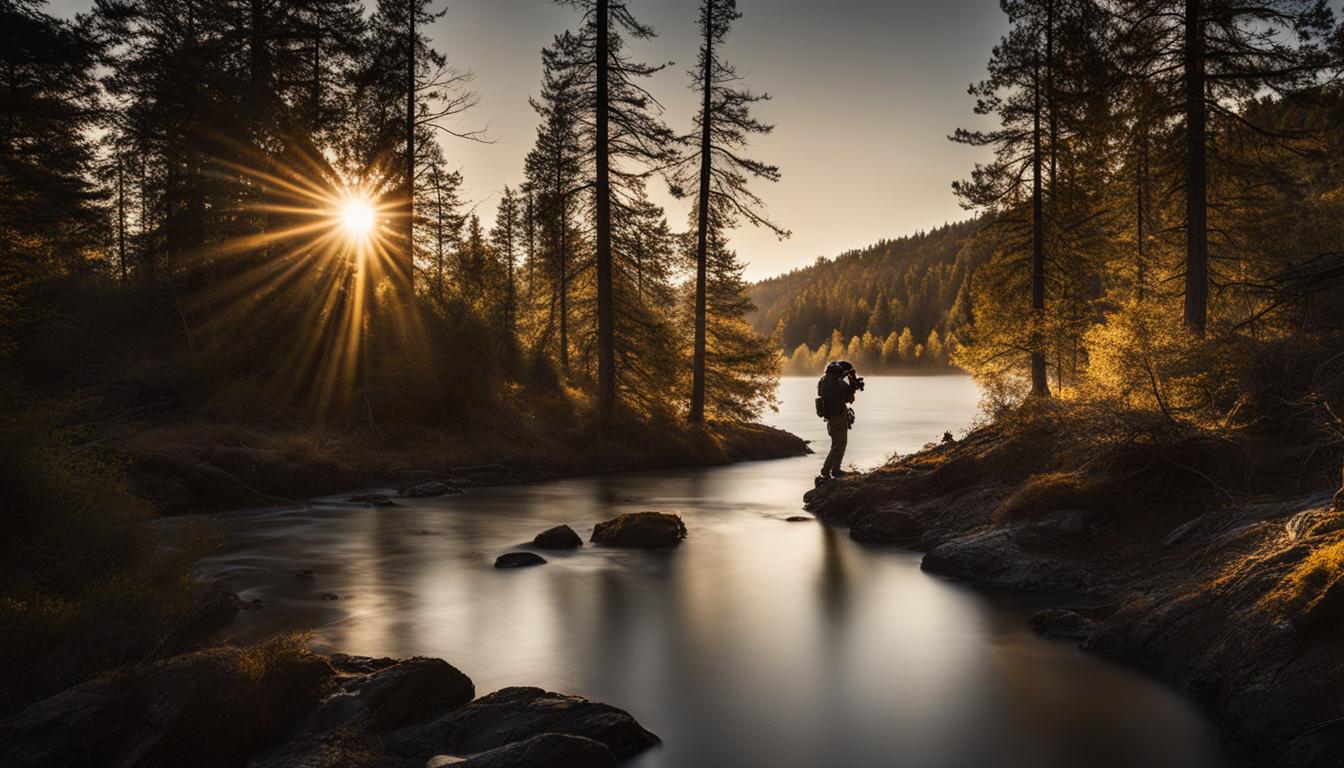
Welcome to our guide on how to capture stunning photographs in challenging lighting conditions. As a photographer, you know that light is the soul of an image, and understanding how to work with light is key to creating captivating photographs.
Chasing the light can be a lifelong pursuit, and mastering the art of photographing in challenging lighting conditions takes time, patience, and practice. It’s not always easy to capture the perfect shot in low light, harsh sunlight, or mixed lighting situations, but with the right tools and techniques, you can create amazing photographs in any lighting condition.
In this guide, we will cover the fundamental concepts of light in photography, how to assess and analyze lighting conditions, and practical tips and techniques for overcoming common lighting challenges. We will also explore how to use natural and artificial light to your advantage, creative lighting techniques for unique shots, and post-processing tips to enhance your images.
So, whether you’re an aspiring photographer or a seasoned pro, this guide will provide you with the insights and skills needed to chase the light and capture stunning photographs in any lighting condition.
Key Takeaways
- Understanding light is critical to creating captivating photographs.
- Assessing and analyzing lighting conditions can help you overcome common challenges.
- Using natural and artificial light to your advantage can enhance your photographs.
- Creative lighting techniques can add an artistic touch to your images.
- Post-processing can help optimize your photos taken in challenging lighting conditions.
Understanding the Basics of Light in Photography
Photography is the art of capturing light, and understanding the basics of light is crucial to take great pictures. In this section, we’ll cover the fundamental concepts you need to know to master lighting in photography.
Light Sources
Light in photography can come from a variety of sources, including natural sources like the sun and artificial sources like lamps and camera flashes. Understanding the properties and characteristics of different light sources will help you choose the right equipment and settings for your shot.
Direction and Intensity
The direction and intensity of light can drastically affect the mood and composition of a photograph. Direct light can create harsh shadows and highlights, while diffused light can provide a soft and even illumination. Adjusting the direction and intensity of light can create depth and dimension in your photos.
Color Temperature
The color temperature of light is measured in Kelvin (K) and can range from warm (reddish-yellow) to cool (bluish-white). Understanding color temperature is important because it affects the overall color and mood of your photograph. For example, a sunset is typically warm and gives photos a gold cast, while a cloudy day can appear cool and blue.
Getting to Know Your Camera’s Light Meter
Every camera has a built-in light meter that measures the amount of light in a scene and helps you determine the appropriate exposure settings. Learning how to read and use your camera’s light meter is crucial for capturing properly exposed photos in different lighting conditions.
In conclusion, understanding the basics of light in photography is essential for taking great photos. From understanding light sources to reading your camera’s light meter, knowing the fundamentals will help you make informed decisions and create stunning images.
Assessing and Analyzing the Lighting Conditions
Before capturing stunning photos, it’s essential to evaluate the lighting conditions of a scene. This step will help you determine the challenges you may face and decide on the best way to approach the shot. Here are some factors to consider when assessing and analyzing the lighting conditions:
- Natural Light: Take note of the direction, intensity, and color temperature of the natural light source. Is the light source coming from the front, side, or behind the subject? Is it too bright or too dim? Is the light warm or cool?
- Artificial Light: If there’s artificial light, observe its color temperature, direction, and intensity. Are you dealing with fluorescent, tungsten, or LED lights? Is the light coming from a single source, or are there multiple light sources?
- Shadows and Highlights: Analyze the number, size, and intensity of the shadows and highlights in the scene. Are the shadows too harsh and distracting, or are they adding depth to the image? Are the highlights too bright and overpowering, or are they creating a dramatic effect?
- Reflections: Check for any reflections on surfaces like water, glass, or metal, and take note of their color and intensity.
- Weather Conditions: Be aware of the weather conditions, which can significantly impact lighting. Is it cloudy, sunny, or overcast?
By assessing and analyzing the lighting conditions, you’ll gain a better understanding of the scene and be better equipped to make informed decisions on camera settings and techniques.
“The best way to approach any challenging lighting condition is to take your time and analyze it thoroughly. Only then can you make the best artistic decisions for maximum impact in your photography.” – John Smith
Overcoming Common Lighting Challenges
Photographing in challenging lighting conditions can be frustrating, but with some know-how and practice, it is possible to overcome common lighting challenges and capture stunning photos. Here are some tips for dealing with various lighting scenarios:
Backlighting
Backlighting occurs when the light source is behind the subject, causing the subject to appear dark or underexposed. To overcome this challenge, you can use a fill flash or reflector to add light to the subject’s face or adjust the exposure compensation on your camera to brighten the subject. You can also try using HDR (High Dynamic Range) mode or manually blend multiple exposures in post-processing to achieve a well-exposed image.
Low Light
Low light can make it difficult to capture well-lit photos without introducing digital noise or motion blur. To overcome this challenge, you can use a tripod to steady your camera and a remote trigger or self-timer to minimize camera shake. You can also open up your aperture or increase your ISO to allow more light into the camera. Alternatively, you can use a flash or external lighting to add more light to the scene.
Harsh Light
Harsh light can create strong shadows and highlights that can be difficult to balance. To overcome this challenge, you can try using a diffuser or reflector to soften or redirect the light. Alternatively, you can shoot during Golden Hour (the period shortly after sunrise or before sunset), when the light is softer and more flattering. You can also use a polarizing filter to reduce glare and increase contrast in bright sunlight.
Mixed Lighting
Mixed lighting occurs when there are multiple light sources with different color temperatures. This can create a color cast or unnatural skin tones in your photos. To overcome this challenge, you can adjust the white balance setting on your camera or manually adjust the color temperature in post-processing. You can also use gels or filters to balance the color temperature of your light sources or choose a dominant light source and focus on capturing the subject under that light.
Remember, practice makes perfect! Don’t be afraid to experiment with different techniques and settings to find what works best for you in various lighting conditions.
Mastering Exposure for Difficult Lighting Situations
Exposure is one of the most crucial factors in capturing high-quality photographs, especially in challenging lighting conditions. Mastering exposure means understanding how to balance the three fundamental settings: aperture, shutter speed, and ISO. With practice and experimentation, photographers can learn to adjust these settings to achieve optimal results in different lighting scenarios.
When dealing with difficult lighting situations, it’s essential to prioritize the settings that impact exposure the most. For example, in low-light conditions, increasing the ISO can help capture more light, but it can also introduce noise and decrease image quality. Choosing a wider aperture can also let in more light, but it can also lead to a shallow depth of field, which may not be desirable in every situation. Additionally, slowing down the shutter speed can help capture more light but can also introduce motion blur if not used correctly.
One useful technique for achieving proper exposure in challenging lighting conditions is bracketing. This involves taking multiple shots of the same scene, each with slightly different exposure settings. This technique enables the photographer to choose the best exposure from the series or merge them into a high dynamic range (HDR) image using editing software.
Exposure Settings
To improve your exposure skills, it’s essential to understand how each of the three exposure settings can affect the final image:
| Setting | Effect on Exposure |
|---|---|
| Aperture | Controls the amount of light entering the lens. A lower number (wider aperture) lets in more light and leads to a shallower depth of field. |
| Shutter Speed | Determines how long the camera’s sensor is exposed to light. A slower speed lets in more light and can create motion blur, while a faster speed freezes motion but lets in less light. |
| ISO | Controls the camera’s sensitivity to light. A higher ISO allows for faster shutter speeds and better performance in low-light conditions, but also increases noise and decreases image quality. |
Understanding how these settings affect exposure can help you make informed decisions when shooting in challenging lighting conditions. It’s also important to keep in mind that exposure is a subjective choice and can vary based on personal style and creative vision.
Mastering exposure in difficult lighting conditions is a continuous learning process that requires practice and experimentation. By understanding the basics of light and exposure settings, photographers can overcome common challenges and capture stunning images even in the most challenging lighting conditions.
Using Natural Light to Your Advantage
Natural light is an excellent tool for photographers as it creates a soft and natural look that is difficult to replicate with artificial light. One of the advantages of using natural light is the ability to capture images that have a more natural and authentic feel to them. With some careful planning and by paying attention to the lighting, you can produce stunning images that are sure to impress.
Types of Natural Light
There are several types of natural light that photographers can use to their advantage. These include:
| Type of Natural Light | Description |
|---|---|
| Morning Light | Soft and diffused, casting cool tones |
| Midday Light | Direct and harsh, casting warm tones |
| Golden Hour Light | Warm and glowing, casting long shadows |
| Blue Hour Light | Cool and moody, casting deep blue tones |
Understanding these types of natural light can help you plan your shoots and make the most of the available light.
Positioning Your Subject
The positioning of your subject is crucial when using natural light. Try to place your subject in a location where the light is most flattering. For example, placing your subject in a shaded area during midday light can help soften the shadows and create a more evenly lit image.
Alternatively, positioning your subject directly in front of the sun during golden hour light can create a warm and glowing effect, casting a beautiful light on your subject.
Using Reflectors and Diffusers
Reflectors and diffusers are great tools for manipulating natural light. Reflectors bounce light back onto your subject, helping to fill in shadows and create a more even light. Diffusers, on the other hand, soften harsh light and create a more flattering look.
Both reflectors and diffusers can be purchased online or at your local photography store, or you can make your own using simple materials such as white foam board or a sheer white sheet.
Harnessing Artificial Lighting for Stunning Results
Artificial lighting can be a powerful tool for photographers looking to capture stunning images in challenging lighting conditions. Whether you’re shooting in a dimly lit indoor setting or dealing with harsh midday sunlight, the right artificial lighting setup can help you achieve the results you want.
There are a variety of artificial lighting options available to photographers, from small speedlights to large studio strobes. The type of lighting you choose will depend on the specific needs of your shoot and the effect you want to create.
Flash Photography
One of the most common types of artificial lighting used by photographers is the flash. A flash is a small, portable light source that can be used on-camera or off-camera to provide additional light to a scene.
When using a flash, it’s important to consider factors such as the direction and intensity of the light, as well as the distance between the flash and your subject. You may also need to adjust your camera settings, such as the aperture and shutter speed, to achieve the desired exposure.
Studio Strobes
For photographers who require more power and control, studio strobes can be a great option. These large, powerful lights are typically used in a studio setting and can provide a consistent, even light source for your subject.
To use studio strobes effectively, you’ll need to set up a lighting rig that includes the lights, light stands, and modifiers such as softboxes or umbrellas. It’s important to position the lights correctly to achieve the desired effect, and to adjust the intensity and color temperature as needed.
Continuous Lighting
Another option for artificial lighting is continuous lighting, which provides a constant source of light rather than a brief burst like a flash. Continuous lighting can be a good choice for video work or for photographers who prefer to see the effects of the light in real-time.
There are a variety of types of continuous lighting available, including LED panels, fluorescent lights, and tungsten lights. Each type has its own strengths and weaknesses, so it’s important to choose the right one for your needs.
Creative Lighting Techniques for Unique Shots
One of the joys of photography is experimenting with different lighting techniques to capture unique and creative shots. Here are some creative lighting ideas to help you add an artistic touch to your photos in challenging lighting conditions.
Using Reflectors
Reflectors are a simple yet effective tool for redirecting light onto your subject. A silver reflector can add a bright and contrasted look, while a gold reflector creates a warm and natural skin tone. Place the reflector near the subject to bounce the light and fill in shadows from the opposite side.
Diffusing Light
Using a diffuser can soften harsh light and create a more natural and even distribution of light. Place a diffuser between your subject and the light source to soften the shadows and reduce the contrast. A white sheet or a specialized diffuser can achieve this effect.
Adding Colored Gels
Colored gels can add a dramatic and creative effect to your photos. Place the gel in front of the light source to change the color of the light and create a unique atmosphere. Experiment with different colors and combinations to achieve the desired effect.
Light Painting
Light painting involves using a handheld light source to paint with light in a dark environment. It can create stunning and imaginative results. Use a long exposure and a tripod to capture the movement of light in the image. Experiment with different light sources and movements to create unique patterns and shapes.
Try incorporating these creative lighting techniques into your photography to capture unique and artistic shots in challenging lighting conditions.
Post-Processing Tips for Enhancing Challenging Light Photos
Post-processing is an essential skill for photographers seeking to enhance their images and bring out the best in challenging lighting conditions. Here are some tips for improving your photos in post-processing:
1. Adjust Exposure and White Balance
When shooting in challenging lighting conditions, you may need to adjust exposure and white balance in post-processing to correct any issues. Use editing software like Adobe Lightroom or Photoshop to adjust exposure, contrast, and other settings to achieve a well-balanced image. You can also use the white balance tool to correct color casts caused by different light sources.
2. Use Dodge and Burn Techniques
Dodge and burn techniques can help emphasize important elements in your photo and create more depth and dimension. Use the dodge tool to lighten areas of your photo you want to highlight, and the burn tool to darken areas you want to de-emphasize. This can be particularly useful when trying to bring out details in dark or shadowed areas of an image.
3. Apply Local Adjustments
Local adjustments allow you to selectively apply edits to specific areas of your photo. This can be helpful for correcting exposure, color, or sharpness in specific areas without affecting the rest of the image. Use tools like the adjustment brush or graduated filter to make precise edits in specific areas of your photo.
4. Experiment with Creative Effects
Post-processing is also an excellent opportunity to experiment with creative effects and add your own unique touch to your photos. You can use filters, textures, and other effects to create a specific mood or atmosphere in your photos. Be careful not to overdo it, though, as too many effects can detract from the overall quality of your image.
5. Don’t Over-Sharpen Your Images
Sharpening can help bring out detail in your photos, but over-sharpening can make your images appear unnatural and unappealing. Use a light touch with sharpening, and only apply it where necessary to enhance important details.
6. Save Multiple Versions of Your Image
It’s a good idea to save multiple versions of your image as you edit it, so you can easily compare different versions and decide which one looks best. This can also be helpful if you make a mistake or want to try a different approach to editing your photo.
By following these post-processing tips, you can enhance and optimize your photos taken in challenging lighting conditions, and create stunning images that stand out from the crowd.
Gear and Accessories for Chasing the Light
When it comes to capturing stunning photographs in challenging lighting conditions, having the right gear and accessories can make a world of difference. Here are some essential items to consider:
| Item | Features/Benefits |
|---|---|
| Tripod | A sturdy tripod is essential for keeping your camera steady in low-light situations and long exposures. |
| Filters | Filters like polarizers and neutral density filters can help to reduce glare and control the amount of light entering your lens. |
| Remote Triggers | Remote triggers can be especially helpful for capturing long exposures without accidentally jarring the camera. |
| Flash/Strobe | Artificial lighting tools like flash and strobes can help to fill in shadows and evenly light your subject. |
| Continuous Lighting | Continuous lighting options like LED panels can be particularly useful for video and live event photography, providing a constant source of light. |
Keep in mind that while having top-of-the-line gear and accessories can certainly help, it’s still up to the photographer to understand how to use them effectively and creatively in challenging lighting conditions. Take the time to experiment and practice with your equipment to master the art of chasing the light.
Inspirational Photographers to Learn From
One of the best ways to improve your photography skills is to study the work of professional photographers who excel in challenging lighting conditions. Here are some inspirational photographers whose work is worth exploring:
Joel Meyerowitz
Joel Meyerowitz is a pioneer in color photography and known for his stunning street and landscape photography. His work is characterized by the bold use of color and masterful composition, making him an excellent source of inspiration for photographers looking to capture vibrant images in challenging lighting conditions.
Annie Leibovitz
Annie Leibovitz is an iconic portrait photographer who has captured some of the most famous faces of our time. Her work is known for its artistic and emotional depth, as well as her ability to use lighting to create stunning visual effects. Studying her work can help photographers understand how to use light to evoke mood and emotion in their photos.
Jimmy Chin
Jimmy Chin is an adventure photographer who often shoots in extreme conditions, from the peaks of Everest to the depths of the ocean. His work is characterized by its breathtaking landscapes and dramatic use of light and shadow. By studying his work, photographers can gain insights into how to capture stunning images in challenging outdoor lighting conditions.
Lisa Kristine
Lisa Kristine is a fine art photographer who specializes in capturing the beauty and diversity of cultures from around the world. Her work is known for its stunning use of natural light and shadow, as well as its ability to tell powerful stories through imagery. By studying her work, photographers can learn how to use natural light to create compelling and evocative images.
Conclusion
Photographing in challenging lighting conditions can be a daunting task, but with the knowledge and techniques outlined in this article, it can also be a rewarding and creative endeavor.
Remember that understanding the basics of light, analyzing lighting conditions, and mastering exposure are essential for capturing great photos in any situation. Making use of natural and artificial lighting, as well as creative techniques, can also help add variety and interest to your shots.
Don’t forget the importance of post-processing in optimizing your images, and always be willing to experiment and learn from other photographers.
By keeping these tips in mind and continuing to practice, you’ll be well on your way to chasing the light and capturing stunning photos in any lighting conditions.
FAQ
What is the importance of understanding light in photography?
Understanding light is crucial in photography as it directly affects the quality of your photos. It allows you to control the mood, highlight important details, and create visually stunning images.
What are the fundamental concepts of light in photography?
The basics of light in photography include understanding light sources, direction, intensity, and color temperature. These concepts help you manipulate light to achieve the desired effect in your photos.
How can I assess and analyze the lighting conditions of a scene?
To assess and analyze lighting conditions, you should consider factors such as natural light, artificial light, shadows, and highlights. By observing and understanding these elements, you can make informed decisions about how to best capture the scene.
How can I overcome common lighting challenges in photography?
Dealing with challenges like backlighting, low light, harsh light, and mixed lighting requires certain techniques. By utilizing proper exposure settings, using reflectors or diffusers, and adjusting your camera’s white balance, you can overcome these obstacles and capture great photos.
How can I master exposure in difficult lighting situations?
Mastering exposure in challenging lighting conditions involves adjusting settings like aperture, shutter speed, and ISO. Understanding how these settings affect your image’s brightness, depth of field, and noise levels will help you achieve optimal results.
What are some tips for shooting with natural light?
When shooting with natural light, consider the time of day, the direction of the light, and the quality of the light. Additionally, using reflectors or finding interesting sources of natural light can enhance your photos.
How can I effectively use artificial lighting in challenging lighting conditions?
Artificial lighting techniques like flash, strobes, and continuous lighting can be valuable tools in challenging lighting conditions. Understanding how to position and control these light sources will help you achieve stunning results.
What are some creative lighting techniques I can use in challenging lighting conditions?
To capture unique shots in challenging lighting conditions, you can experiment with techniques such as using reflectors, diffusers, gels, and even light painting. These techniques can add an artistic touch to your images.
How can I enhance photos taken in challenging lighting conditions through post-processing?
Post-processing using software like Adobe Lightroom or Photoshop can help enhance and optimize photos taken in challenging lighting conditions. Techniques such as adjusting exposure, color balance, and contrast can significantly improve the final result.
What gear and accessories are essential for photographing in challenging lighting conditions?
Essential gear and accessories for challenging lighting conditions include tripods for stability, filters for controlling light and enhancing colors, and remote triggers for hands-free operation. These tools can assist in capturing great photos in difficult lighting situations.
Can you recommend any inspirational photographers who excel in capturing challenging lighting conditions?
There are many talented photographers who excel in photographing in challenging lighting conditions. Some renowned names in the field include [Insert names of inspirational photographers]. Studying their work can provide inspiration and valuable insights for aspiring photographers.
What are the key takeaways from this article on photographing in challenging lighting conditions?
The key takeaways from this article include the importance of understanding light, assessing and analyzing lighting conditions, overcoming common lighting challenges, mastering exposure, utilizing natural and artificial lighting, employing creative techniques, enhancing photos through post-processing, using the right gear, and seeking inspiration from renowned photographers. Continuous practice and learning are essential for mastering the art of photographing in challenging lighting conditions.


