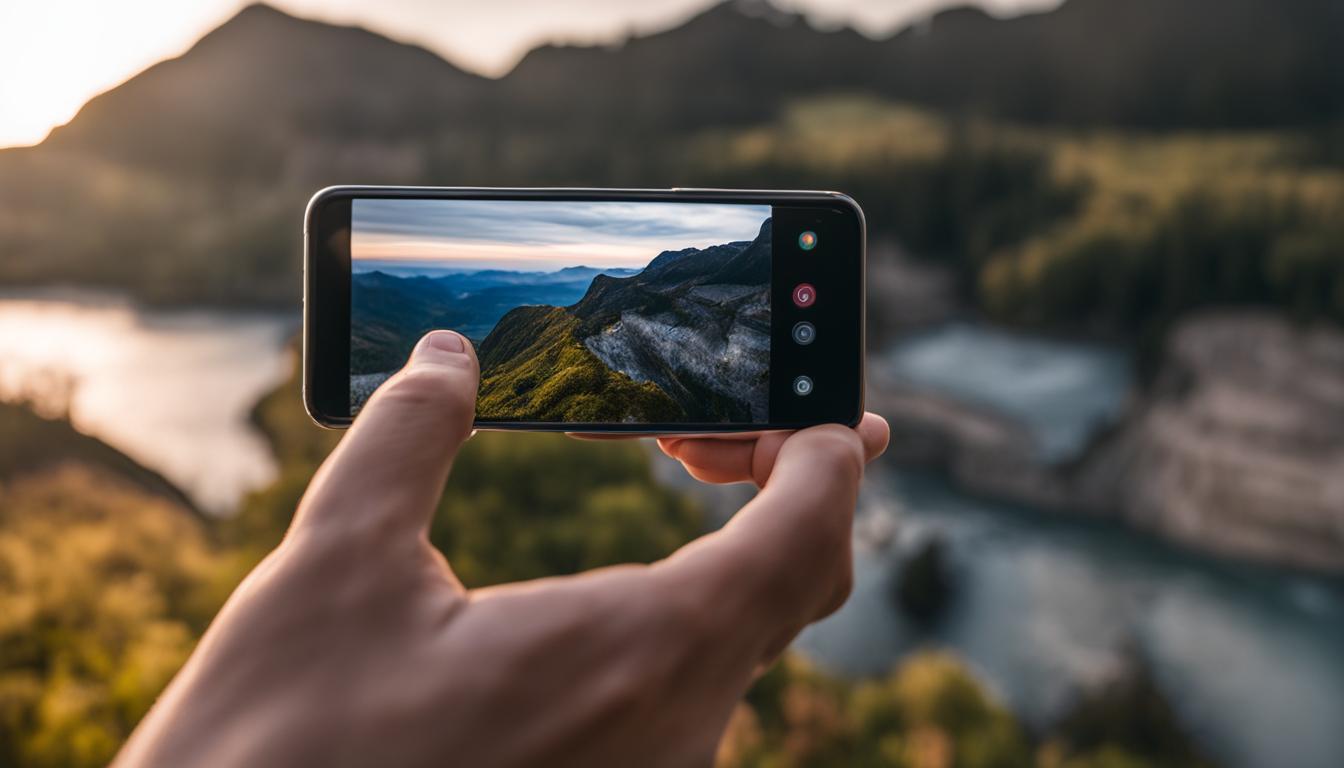
Mobile phones have come a long way since their invention. With the rise of smartphone photography, capturing stunning photos has become easier than ever before. Whether you’re a professional photographer or just someone who loves to take photos, your smartphone camera can be a powerful tool to unleash your creativity and capture beautiful moments.
But taking outstanding shots with your smartphone requires more than just pointing and shooting. In this article, we’ll explore a range of tips and tricks to help you capture stunning mobile shots and make the most of your smartphone camera.
Key Takeaways:
- Smartphones have revolutionized the way we take photos.
- Tips and tricks are essential to capture stunning photos with your smartphone.
- Understanding camera settings and composition techniques can help you create visually appealing photos.
- Mastering lighting and exposure can enhance the quality of your photos.
- Photo editing apps can be used to enhance your photos and unlock unique effects.
With the help of the tips and tricks outlined in this article, you’ll be able to take your mobile photography skills to the next level. Keep reading to explore the evolution of smartphone cameras, learn about camera settings and modes, and discover how to capture stunning portraits, macro shots, and much more.
The Evolution of Smartphone Cameras
Smartphones have come a long way since their inception, and so have their cameras. The evolution of smartphone cameras has been nothing less than remarkable. Modern-day smartphones come with highly advanced cameras capable of capturing stunning photographs.
Earlier smartphones had basic cameras with low resolution, but today’s smartphones feature high-quality lenses and sensor technology that produce high-resolution images. The cameras on modern-day smartphones have become so advanced that they can compete with professional cameras, making them a popular choice among photography enthusiasts.
The Early Days
The first-ever camera phone was released in 2000 by Sharp Corporation in Japan. Since then, there has been a rapid evolution in smartphone camera technology. The early smartphones featured cameras with a resolution of only 0.3 megapixels.
As smartphones evolved, so did their cameras. Today, smartphones boast cameras with resolutions ranging from 12 to 108 megapixels, a significant improvement from where we started.
Improvements in Lens Technology
The lenses on smartphone cameras have also seen significant improvements. Early smartphone cameras had fixed-focus lenses, which meant that the lens could not be adjusted. Modern-day smartphones, however, have advanced lenses with adjustable apertures, shutter speeds, and optical zoom capabilities that give users more control over their photography.
Advancements in Sensor Technology
Sensor technology has also seen significant advancements in smartphone cameras. Modern-day smartphone cameras feature larger sensors that capture more light, resulting in better low-light photography. This, coupled with the high-quality lenses, produce sharp and detailed images in almost any lighting condition.
Software Enhancements
Another major factor contributing to the evolution of smartphone cameras is the software enhancements. Most smartphones today come equipped with features such as image stabilization, facial recognition, and image processing, which help produce high-quality images.
Smartphone cameras also have access to a range of photo editing apps that allow users to enhance and modify their photos, giving them a professional touch.
Understanding Camera Settings and Modes
If you want to capture stunning photos with your smartphone camera, it’s essential to understand the various camera settings and modes available. By mastering the right settings and utilizing the best modes, you can take your smartphone photography to the next level.
Camera Settings
The camera settings on your smartphone give you control over the exposure, focus, and other important elements of your photos. Here are some of the key settings you should know:
| Setting | Description |
|---|---|
| Exposure Compensation | Allows you to adjust the brightness of the photo. |
| ISO | Determines the sensitivity of the camera to light. |
| White Balance | Adjusts the colors in your photo to match the lighting conditions. |
| Focus | Determines which part of the photo is in focus. |
Experiment with these settings to see how they affect your photos and find the perfect combination for your needs.
Camera Modes
Most smartphone cameras come with a range of modes that are designed to capture specific types of photos. Here are some of the most common modes:
- Portrait mode – blurs the background and keeps the subject in focus
- Macro mode – allows you to take close-up shots of small objects
- Panorama mode – captures a wider field of view than a normal photo
- Night mode – enhances low light photos by adjusting the exposure and reducing noise
Each mode is designed to optimize the camera settings for a specific type of photo. Explore these modes and experiment with them to see how they can enhance your photos.
Composition and Framing Techniques
Composition and framing are essential aspects of smartphone photography that can make a huge difference in the quality of your photos. By understanding and applying these techniques, you can create visually appealing and engaging images that capture your subject in the best possible way.
Here are some composition techniques you can use:
- Rule of Thirds: Imagine breaking your image into thirds both horizontally and vertically, so you have nine parts. Place your subject where the lines intersect for a more balanced and visually pleasing composition.
- Leading Lines: Use natural lines in your scene, such as a pathway or a road, to lead the viewer’s eye towards the subject.
- Symmetry: Use symmetry to create a sense of balance and harmony in your image.
When it comes to framing your subject, there are several techniques you can use:
- Cropping: Use cropping to remove any distracting elements in your photo and to focus on the subject.
- Foreground Elements: Adding elements in the foreground can help create depth in your image and add interest.
- Frame Within a Frame: Place your subject within a frame, such as a window or door, to add an extra layer of interest and depth to your image.
Remember, composition and framing are subjective and can vary depending on the photographer’s style and vision. Experiment with different techniques and find what works best for you and your subject.
Mastering Lighting and Exposure
One of the key elements of photography is lighting. It can make or break a shot, even more so when using a smartphone camera. But fear not, with some simple tips and tricks, you can master lighting and exposure settings to take your smartphone photography to the next level.
Understanding Lighting
Firstly, it’s important to understand the different types of lighting. Natural, artificial, and ambient lighting all have their unique qualities that can affect the look and feel of your photos. Natural lighting is ideal for outdoor shots, while artificial lighting is best for indoor portraits. Ambient lighting refers to the existing light in a scene and can play a crucial role in setting the mood and tone.
Also, keep in mind the direction of the light source. Backlighting, side lighting, and front lighting can create different effects. Backlighting can create a silhouette effect, highlighting the subject’s outline. Side lighting can add depth and texture to your subject, while front lighting is the most common and creates a well-lit image of the subject.
Mastering Exposure Settings
Exposure settings are another crucial element of smartphone photography. It refers to the amount of light that enters your camera lens. The three exposure settings to know are ISO, shutter speed, and aperture. ISO controls the sensitivity of your camera to light. Shutter speed controls the length of time the camera’s shutter remains open. Aperture controls the size of the camera’s opening, allowing more or less light into the camera.
When taking photos in low-light situations, a high ISO and a longer shutter speed can help capture more light. However, be wary of high ISO settings as it can lead to a noisy or grainy image. When taking photos in bright settings, decreasing the ISO and using a faster shutter speed and smaller aperture can help avoid overexposure.
Utilizing HDR Mode
Most smartphones have a built-in HDR (High Dynamic Range) mode. This mode captures multiple shots at various exposures and combines them to create a well-exposed and detailed image. It’s best used in high-contrast scenes, where there is a mix of bright and dark areas. However, be mindful that using HDR mode can result in a slightly artificial look to your photos.
Tips for Lighting and Exposure
- When taking photos outdoors, the golden hours are the best time to capture stunning shots. This refers to the hour after sunrise and the hour before sunset, where the light is softer and more flattering.
- Don’t be afraid to experiment with different lighting angles and exposure settings to find your unique style.
- Adjust your exposure settings in real-time using the built-in exposure control. Simply tap and hold on the area of the image you want to adjust the exposure for, and adjust the slider accordingly.
- Consider investing in external lighting gear for smartphone photography, such as a small LED light or ring light, to enhance your lighting options.
With these lighting and exposure tips, you can take your smartphone photography to a whole new level. Don’t be afraid to experiment and find your own unique style!
Enhancing Colors and Contrast
Colors and contrast are essential components of any visually appealing photo. Luckily, there are several photo editing apps that can help you enhance these elements in your smartphone photos.
One effective technique is adjusting the saturation levels of your image. Increasing the saturation can make colors pop, while decreasing it can create a more muted and moody effect. Be careful not to overdo it, as this can result in an unnatural and garish image.
Another way to enhance colors and contrast is by using the “curves” tool in your editing app. This allows you to adjust the brightness and contrast of specific areas of your photo, creating a more dynamic and visually engaging image.
When adjusting contrast, be mindful of the highlights and shadows in your image. Too much contrast can result in blown-out highlights or completely black shadows, which can be distracting and take away from the overall composition of your photo.
Experiment with different editing techniques to find what works best for your style and the specific photo you are working with. With practice, you’ll be able to create stunning and vibrant smartphone photos that stand out from the crowd.
Capturing Stunning Portraits with Your Smartphone Camera
Portraits are a popular subject in photography, and with the rise of smartphone photography, it’s now easier than ever to capture stunning portraits on-the-go. Here are some tips and tricks to help you take professional-looking portraits using your smartphone camera:
1. Use Portrait Mode
Most smartphones now come equipped with a portrait mode, which allows you to blur the background and create a shallow depth of field effect. This effect can give your portraits a professional and polished look.
2. Find Good Lighting
The key to a great portrait is good lighting. Look for natural light sources such as a window or open door, and position your subject so that the light is hitting them from the side or front. Avoid harsh overhead lighting which can cast unflattering shadows on the face.
3. Experiment with Angles
Don’t be afraid to experiment with different angles and perspectives to add interest to your portraits. Try shooting from above or below, or even from the side for a dramatic effect. Encourage your subject to move and pose in different ways to capture unique and dynamic shots.
4. Use Editing Apps
After you’ve captured your portraits, you can use editing apps to enhance and edit them further. Adjust the brightness and contrast, crop the image, and add filters to make your portraits pop.
With these tips, you can take your smartphone photography skills to the next level and capture stunning portraits with ease.
Exploring Macro Photography with Your Smartphone Camera
Macro photography is a fascinating technique that allows you to zoom in and capture the intricate details of small objects. With a smartphone camera, you can experiment with this technique and produce stunning close-up shots.
To take macro photos with your smartphone, you don’t need any fancy equipment. Most smartphones have a macro mode that you can activate by getting close to the subject and tapping the screen to focus. Some smartphones also have dedicated macro lenses that you can attach to the camera for even better results.
When taking macro photos, it’s important to stabilize your smartphone camera to prevent blurry shots. Use a tripod or find a stable surface to place your phone on. You can also use the built-in timer or a remote shutter release to minimize camera shake.
Macro photography is all about capturing the small details that often go unnoticed. Look for interesting textures, patterns, and colors that can make your photos stand out. Take advantage of natural lighting or use a smartphone ring light to illuminate your subject.
| Subject | Distance | Tips |
|---|---|---|
| Flowers | 2-3 inches | Highlight the details of the petals and stamen for a dramatic effect. |
| Insects | 1-2 inches | Focus on the eyes and wings for a unique perspective. |
| Food | 3-4 inches | Reveal the texture and color of your dishes for mouth-watering photos. |
Experiment with different angles and compositions to find the best shot. Sometimes, a slight adjustment can make a huge difference in the final result. Don’t be afraid to play around with the focus and exposure settings to achieve the desired effect.
After taking your macro photos, you can enhance them with photo editing apps and software. Adjust the brightness, contrast, and colors to make your photos pop. You can also add filters and effects to create a unique look.
Macro photography with a smartphone camera can open up a whole new world of creative possibilities. With a little practice and experimentation, you can capture stunning close-up shots of everyday objects that will amaze and inspire your audience.
Long Exposure and Night Photography Tips for Capturing Stunning Mobile Shots
Long exposure and night photography can produce breathtaking images that capture the beauty of the world around us. With your smartphone camera, you can achieve impressive results with a few tips and tricks.
What is Long Exposure Photography?
Long exposure photography is a technique that involves using slow shutter speed to capture stationary subjects while blurring the moving elements in the frame. This results in stunning images that showcase motion and stillness in a single shot.
Capturing Long Exposure Shots with Your Smartphone Camera
To take long exposure shots with your smartphone camera:
- Use a tripod or stabilize your phone to avoid camera shake
- Find a stationary subject with moving elements, such as a waterfall or traffic
- Adjust your camera’s exposure time by tapping on the screen and using the slider
- Use a remote shutter or the timer function to prevent any movement
- Experiment and adjust the settings to achieve the desired effect
Tips for Night Photography
Night photography can be challenging, but with the right techniques, you can capture stunning photos even in low-light conditions.
- Find a well-lit subject or location
- Use a tripod or rest your phone on a stable surface
- Adjust the exposure settings to avoid overexposure or underexposure
- Experiment with different ISO levels and shutter speeds to find the right balance
- Consider using external lighting sources, such as a flashlight or streetlights, to enhance the shot
Tips for Action and Sports Photography
Mobile phones have made action and sports photography more accessible than ever before. With advancements in smartphone camera technology, it’s now possible to capture fast-paced moments with ease. However, to take your mobile photography skills to the next level, you need to understand some tips and tricks for capturing action and sports shots.
Tip #1: Use burst mode – One of the biggest challenges in action and sports photography is capturing the perfect moment. With burst mode, your smartphone camera takes a series of photos in quick succession, allowing you to choose the best shot afterward. To activate burst mode on your smartphone camera, simply hold down the shutter button.
Tip #2: Know your subject – Understanding the sport or activity you’re photographing is crucial for capturing the right moment. By knowing the rhythm and patterns of the sport, you’ll increase your chances of capturing the perfect shot.
Tip #3: Use the right camera settings – To effectively capture fast-moving subjects, you need to understand the camera settings available on your smartphone. Experiment with shutter speed, ISO, and focus modes to find the best settings for the situation.
| Shutter Speed | A faster shutter speed (1/1000 of a second or higher) is ideal for capturing fast-moving subjects without blur. |
|---|---|
| ISO | The higher the ISO, the more sensitive your camera is to light. A higher ISO is ideal for low-light situations but can also introduce noise to the image. |
| Focus Modes | Continuous focus mode is ideal for capturing fast-moving subjects. This mode automatically refocuses on the subject as it moves, providing you with sharper images. |
Tip #4: Get the right angle – Capturing action and sports shots from the right angle can make a big difference in the overall impact of the image. Experiment with different angles and perspectives to find the best shot.
Tip #5: Don’t forget about composition – Even when capturing fast-paced moments, composition and framing are still essential for creating visually appealing images. Use the rule of thirds, leading lines, and other composition techniques to guide the viewer’s eye through the image.
With these tips in mind, you’re on your way to capturing stunning action and sports shots with your smartphone camera. Remember to experiment with different settings and techniques, and don’t be afraid to try something new. Happy shooting!
Editing and Post-Processing Tips
Editing and post-processing are crucial steps in taking your smartphone photography to the next level. With the abundance of photo editing apps available, you can easily enhance and transform your smartphone photos into stunning works of art. Here are some photo editing and post-processing tips to help you turn your smartphone photos into masterpieces.
1. Use the Right Apps
Choosing the right photo editing app can make all the difference in the world. Some of the most popular apps include Adobe Lightroom, VSCO, Snapseed, and Afterlight. Each app has its unique features, so find one or two that work for your editing style and needs.
2. Crop and Straighten
Cropping and straightening your photos can significantly improve their composition. Use the crop tool to remove unwanted elements and create a more appealing composition. The straighten tool helps to correct any tilt in your photo and make it look more professional.
3. Adjust Exposure and Contrast
Playing with exposure and contrast can have a drastic impact on the mood and tone of your photos. Overexposure can wash out the details in your photos, while underexposure can make them appear too dark. Adjusting the contrast can help bring out details and add depth to your photos.
4. Enhance Colors
Colors can make or break a photo. Use the saturation tool to make colors pop or lower the saturation for a more muted and subtle look. Adjusting the white balance can also improve the color accuracy of your photos.
5. Sharpen and Reduce Noise
Finally, use the sharpen tool to enhance details and add clarity to your photos. You can also reduce any noise or graininess in your photos using the noise reduction tool.
By following these simple editing and post-processing tips, you can take your smartphone photos from ordinary to extraordinary. Experiment with different techniques and find your own editing style to create visually stunning photos.
Conclusion
Smartphone photography is a constantly evolving art, and with the right tips and tricks, stunning mobile shots are within reach. From understanding camera settings and modes to exploring the world of macro photography and capturing stunning portraits, the possibilities are endless.
Unleash Your Creativity
With a little bit of practice and experimentation, you can unleash your creativity and capture breathtaking moments with your smartphone camera. Don’t be afraid to try new techniques and explore the different features and modes available on your device.
Get Started Today
Now that you have learned about some of the key elements of smartphone photography, it’s time to get started. Grab your phone, head out into the world, and start capturing those stunning shots. With a little bit of patience and creativity, you will be amazed at what you can achieve.
So go ahead, give it a try!
FAQ
What is smartphone photography?
Smartphone photography refers to the act of capturing photos using a smartphone camera. It has become increasingly popular due to the convenience and advancements in smartphone camera technology.
Why should I learn tips and tricks for smartphone photography?
Learning tips and tricks for smartphone photography can help you capture stunning shots with your mobile device. It allows you to maximize the potential of your smartphone camera and enhance the quality of your photos.
How has smartphone camera technology evolved over time?
Smartphone camera technology has undergone significant advancements, leading to improved image quality, features, and capabilities. The evolution of smartphone cameras has revolutionized the way we capture photos.
What are camera settings and modes on a smartphone?
Camera settings and modes on a smartphone refer to the various options available to customize your photography experience. They include settings like exposure, focus, white balance, and shooting modes like panorama or portrait mode.
How can I improve the composition and framing of my smartphone photos?
Improving composition and framing involves techniques such as the rule of thirds, leading lines, and finding interesting angles. These techniques help create visually appealing and well-composed smartphone photos.
How can I master lighting and exposure in smartphone photography?
Mastering lighting and exposure in smartphone photography involves understanding how to manipulate natural or artificial light sources and effectively adjust exposure settings on your smartphone camera for ideal results.
How can I enhance colors and contrast in my smartphone photos?
You can enhance colors and contrast in your smartphone photos through photo editing apps. These apps allow you to adjust color saturation, brightness, contrast, and apply filters to achieve the desired effect.
What are some tips for capturing stunning portraits with a smartphone?
Tips for capturing stunning portraits with a smartphone include finding good lighting, using portrait mode or depth-of-field effects, experimenting with angles, and directing your subject to create a natural and appealing composition.
How can I explore macro photography using my smartphone camera?
Exploring macro photography with a smartphone involves techniques such as using macro lens attachments, getting close to the subject, utilizing manual focus options, and experimenting with different angles and compositions.
How can I capture stunning long exposure and night photography shots with my smartphone?
To capture stunning long exposure and night photography shots with a smartphone, you can utilize apps that offer long exposure modes, stabilize your phone on a tripod or stable surface, and experiment with different exposure settings.
What are some tips for action and sports photography with a smartphone?
Tips for action and sports photography with a smartphone include using burst mode, anticipating the action, utilizing continuous autofocus, and experimenting with different shooting angles to capture dynamic moments.
How can I edit and post-process my smartphone photos?
Editing and post-processing your smartphone photos can be done using various editing apps. These apps allow you to adjust exposure, contrast, colors, crop, and apply filters to enhance the overall look and feel of your photos.


