Hi, I read a post at dpreview written this guy Mark Watson, he has a very good super macro gallery on flickr – link, so he’ve been asked to share the way he got the right lighting for those macro images, so he did, and that’s ridiculously easy, handy and cheap!


Here we go:
Step 1: You mark on a piece of paper the head size of your strobist flash.


Step 2: Mark the flash head size on the pringles box and cut a hole in it , the size of your flash head.


Step 3: Making the front panel diffuser. Mark used here a protection paper that came with a filter that he bought some tןme ago


Step 4 :Putting the front panel diffuser together. You’ll have to make sure its a bit bigger than the pringles, so you can close the box and the diffuser is boxed in.

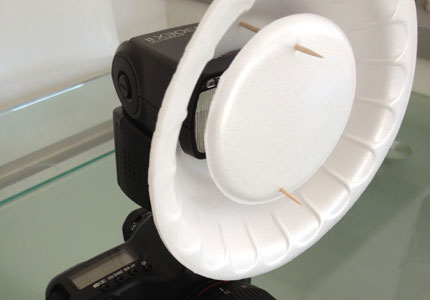
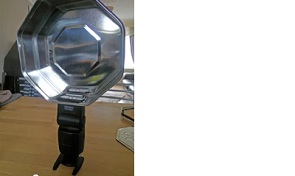
Step 5: Attaching to the camera. Mark puts the flash on the camera with the Pringels tube and tilting the flash one click forward so the light will be directed to the front of the camera.

Some great results ,I actually don’t like this bug image, but hi its amazing details and perfect macro lighting for zero cash…


I want you to share your DIY macro lighting or macro images!!!
This is a very simple and acctually one of the funniest tuts here… Althought it seems the light is preaty good out of the Pringles box, I’d consider putting it some more bucks or cents and feather the inside of the tube with some tin foil, it will make wonders…
I’ll try it!!!
Nice one!
I like the initiative, saw that kind of gadget on a camera and didn’t really knew what is it about…
Thank you guys!
THNX, Its a very easy and simple DIY!
While reading this tutorial, I finished the contents of a Pringles can and decided to make one of these. I guess it took maybe 15 minutes to complete (without painting). I see a suggestion for foil to be applied to the inside of the can. I have large hands and putting foil inside would be nearly impossible for me. The can is lined with a foil like surface so adding foil may not accomplish much, but I’ll keep it in mind. On my version I used some white velum as a diffuser which can be changed to different colors for added effect. Great Idea !
Hi Jeff,
Thanks for the tip! Your are welcomed to send me some images of your DIY pringles macro flash and I’ll post it here.
TNX!