This one is a second tutorial based on Dr. Tilo “Gallo” Gockel photography work, I advise you t o visit his site (here) . Tilo writes in German, but watching the  behind the scenes of his works and use Google Translate is pretty much enough to get it. He is a very talented strobist guy , the first tutorial was about shooting in your bathtub, as very nice one. However this time I want to write about a guitar photography setup I saw, So if you wonder “how to photograph my guitar?” you are in the right place!!!
I have to say that one of my first attempts on photography, was about 20 years ago, I had an HP315 digital camera, yes, I know it sounds like a desktop printer today’s but there were not to many options out there and if I remember correctly HP was a Pentax branded camera… But with the HP “digital Camera” I tried my first studio photography session and photographed my electric guitar. No need to mention that there where no flash options then and no strobist sites or even Internet, so you had to manage…Every time I see a nice guitar portrait image, it reminds me those times.
Tilo used 4 lights this time for this cover shoot, lets see how this image photographed!
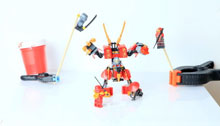
So before we talk about the how to, lets see the setup first:
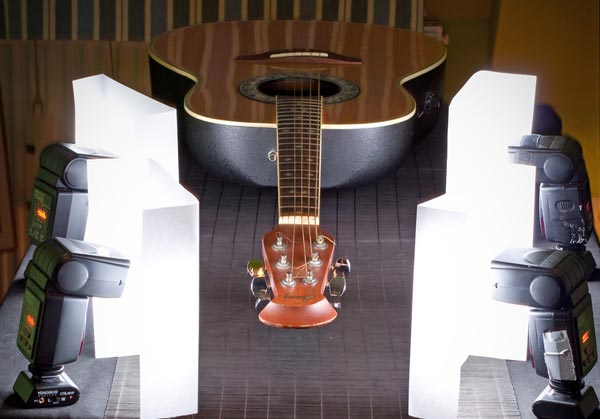
4 flash photography setup – photographing your guitar:
For this work, Tilo uses very extremely basic gear, if you don’t have 4 softboxes (not many strobists doo), you can try this too.
- Flash gear – 4 basic YN4600 or YN460II flash units. I like those flashes a lot, they are very very cheap (less than 50$ on amazon – YN460II
), you can even find on some sites, the older version YN460 for less than 40$!!! totally a steal!
- diffuser – My god !!! 4 paper softboxes who do the job! You can get today some budget small foldable softboxes (LumiQuest SoftBox style) for about 8$, but those paper softbox are nice too!
- triggering – Those triggers are the old version of the YN602, Tilo uses them here as a flash stand too.
- Camera and settings : Canon 500D- Settings: 1/4sec, ƒ/10, ISO 100 ,50 mm. This is it!
- Flash power – I don’t have the exact numbers, but judging by the look on the YN4600 led screen, they are set at about 1/2 full power.
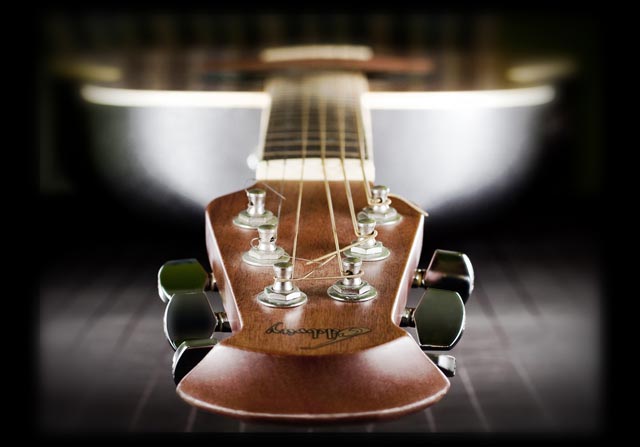
This is it. a very simple and easy to do setup all you have to do is to try it yourself. Here is the final image:
If you liked it as much as I did, PLEASE take a minute and share it with your friends,feel free to drop a line and ask whatever!!!

btw.: as you can see in the shot above: the guitar shot really needed a good makeover …. this is, how it was done (in german, but you should get the idea):
http://vimeo.com/45646008
cheers, Tilo ~gallo~
Hi Tilo,
The BTS is very ince and a very good video.
We are going for a trip to Berlin at the end of the month and I’ve just realized that German, is the ONLY language I don’t understand at all!!!
I can manage some words in almost every other country, but German not a single word…
This is going to be fun…