Wine bottles photography is a relatively tricky task, however as you will see in the next tutorial, you can photograph it at home with some decent/budget photography gear (the way I like it `-)). I know that there is a room for improvement in this tut, but this is one way to photograph the bottles. let dig in and start with the basics:
The gear I used for this tutorial:
- Camera– Canon 5DMKII

- Lighting – YN568EX and YN565EX (in the last example I added another YN565EX for flare effect).
- Trigger and flash control – The new Debao ST-e2 (reviewed here), a great flash control for home studio (this one is my favorite for now).
- Diffusion gear – 90cm*20cm softbox for the main light, 80cm octagonal softbox. Both with grid in part one.
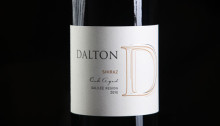
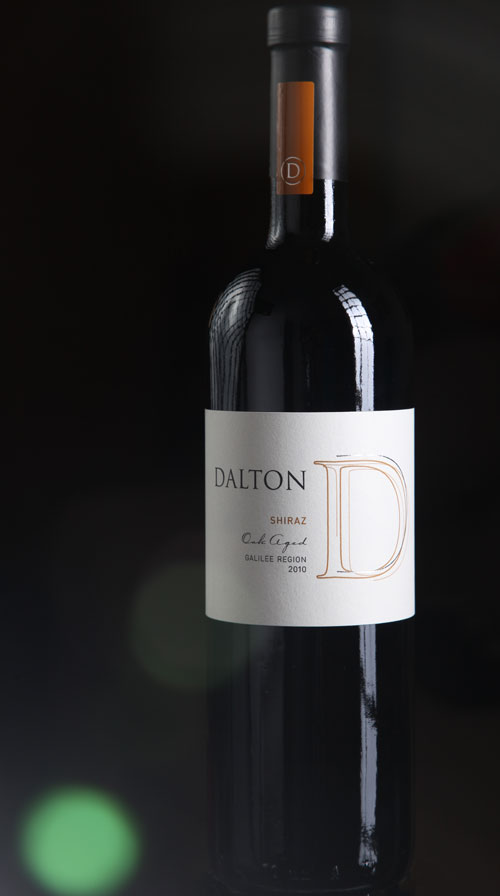
- Wine Bottles – Dalton wine bottle , made in Israel!!!
- Additional gear – lightstands , tripods.
The basic setup – how to photograph wine bottles:
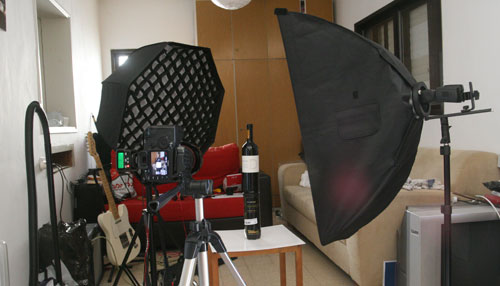
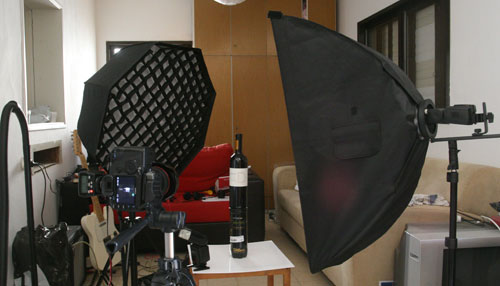
You could get the idea from checking the image below ,sorry for the mess, but this is my current hoe studio…`-)
- Wine bottle – I put in on a tennis balls canister, so it will be easier to erase the surface it was put on and eliminating some of the reflections that could happen if you’ll put it on a desk.
- Main light – the strip softbox on the right , with grid to create a more concentrated light source. It’s a 90cm*20cm stripbox with a bowens to speedligtht adapter. Its a very handy adapter and you should have one of those too. With YN568EX attached, this will be controlled by the Debao as A.
- Fill light – I used here a 80cm popular foldable softbox you might already have/know. I added a grid to it. Used it for fill light and positioned from behind.YN565EX in it.Controlled as B from the Debao ST-e2.
- Flash settings – Main light YN568ex set for 1/2th full power. Fill/back light set for about 2/3 stop lower/4th+1/3 full power.
Here is the result for the first setup:
 What you probably noticed here is the mark of the grid the softboxes leave on the bottle, some may like it some won’t, that why we took another shot, this time without the grids.
As the grid stops some of the light, we had to low down the flash power, about 1 stop each :
- Main light is set to 8th full power
- Fill light is set to/16th full power.
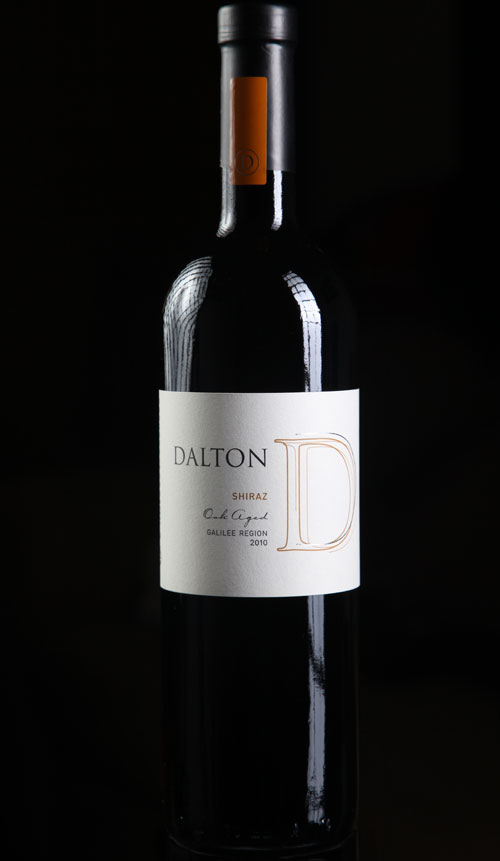
Here is the result this when removong the grid panels:
 Last, I wanted to add different look to image, so I decided to add another YN565EX to the gang and pointed it toward the camera, but not direct to the camera. this added some flare to the image, take a look:
Update (28/3/2015)
I was looking for a setup that uses a white background. In my shoot I used a black background, that gave the wine bottle a drak finish.
Modifing the image into a white image with blowen away whites isn’t to complicated, found this tutorial at Tom’s site, unlike my tutorial Tom is using studio strobs insteed of small flashes.
The setup isn’t to comlicated and can be worked out with small flashes too.
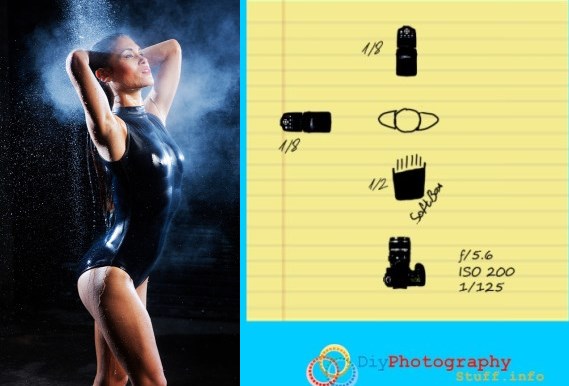
Here is his setup:

Here is the final image is :

Well this is it for this time, I hope you enjoyed this.
PLS share it if you liked it.
Feel free to ask anything in the comments section below.

One thought on “How to Photograph Wine Bottles – Part one”