Amazing product photography 1$ technique!
If you want to know how to do this easy 1$ (if you have the off camera flashes) dig in there are some examples and outcomes that you wouldn’t imagine how easy it is to do it!!!

For the bset use of this tutorial you should also read the post on how I made those two easy shoe box soft box for portable flashes (DIY small softbox).
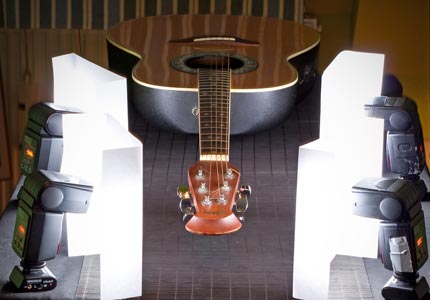
So lets start:About the product photography setup-background and surface :I use a black magnet board as the surface the benefits of it are that you can actually use your studio stuff for other uses,I simple take it when I shoot the products.The black background in this case is a bristol black sheet paper glued to the wall/cupboard.This setup will take you about 5 minutes to build.The second step is to setup the flash in their softboxes.I use the main light at the right side of the product photography object (the canon 30D) I usually start on 1/4 of full power (Canon 550EX),the second shadow light is the Canon 580EX that is set at the begging of the shootout on 1/16 of full power and might be stepped up to 1/8 of full power.The last thing is setting the camera,almost always I start at f 1/7.1 , 1/160sec iso 200.Those settings will “kill” all the ambient light in the room and let the flashes rule!
So lets summerise it:
- right flash=main light 1/4 full power.
- Left flash=secondary light 1/16-1/8 full power.
- Camera : f1/7.1,1/60 sec , ISO 200.
Now lets see what can we produce here!
Product photography setup no.1:
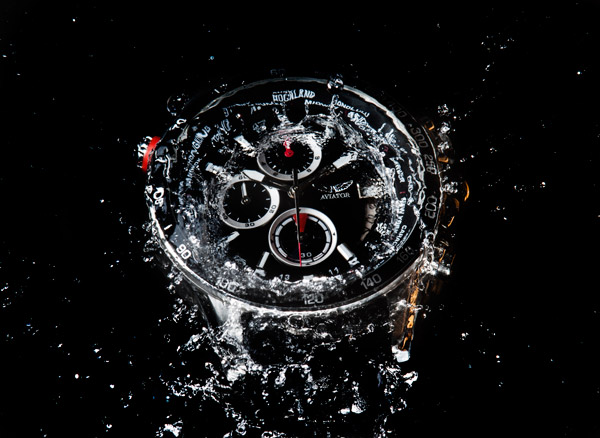
This setup used me for the cover shot on this product photography tutorial.Its one of hte most simple and basic product photography setups available.The main light lights the product photographed,while the second one light from behind with lower power and lights the product curves and lines.This is how I did it:

Product photography setup no.2:
Here we moved the back fill light from setup number one to the front of the product photography object.The effect is different as you can get more details from the front left side of the camera and also maintain the right side domination.Here is the setup used:

Two examples are given for this product photography setup.

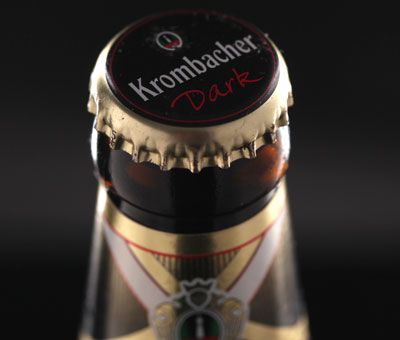
For the image above we used the left fill flash on 1/16 of full power.In this case we got much more details on the front left side of the camera and the lens text in the front left side is suddenly showing.If you try to get some details out you’ll also see the top three operation buttons of the camera.In the image below we’ll get the fill flash a stop higher and look what we got:more details!!!

In this setup you extract even more details from the lens,more detail from the cameras top control power(you can actually see that there are four bottons,not three as in the previous picture).
In the next post we’ll explore another two versions of that setup as we’ll move the left light little higher,and in another setup will use only one light to get a more dramatic output.
So stay tuned for more amazing easy to use product photography tutorials and let us know if you have some questions!
Part II now published- easy product photography

One thought on “Amazing product photography 1$ technique!-Part I”