Easy to do small DIY product photography setup with home made lighting stuff.
Simple studio product photography setup that will get this:

You probably heard the words: “one pictures worth thausends words”…Yep today you must have good pictures of your products in order that the potential web costumer wil shop and buy in your shop!In this lesson I’ll try to show the basics of products photography and how you can do it well with almost basic equipment!
Our role model this time will be the Konica C35 film camera,who looks flewless but lacks of a battery so its days of glory are over for now (not mentioning I use the Pentax SpotMatic SP insteed).So it will be my model for lets say an online used camera on eBay.
What you’ll learn in this tutorial:
- Comparing On-Camera Flash to Studio Lighting(Diy softbox and off camera flash).
- Setting Up a Main Light with the DIY softbox.
- Adding a Fill Light (on camera flash).
- Adjusting fill flash power.
What you’ll need:
- The simple DIY softbox we did here (simple DIY SoftBox)
- One or two flash units ,I use the Canon 580EXII(master flash) and Canon 430EX(flash in my DIY soft box).
- White backdrop.I use a mapel paper-it has some plastic feel,but its more resistant than regular paper.You could use any big sheet of white paper.
- White foam board that will use as the surface for the product photography.
Lets start!
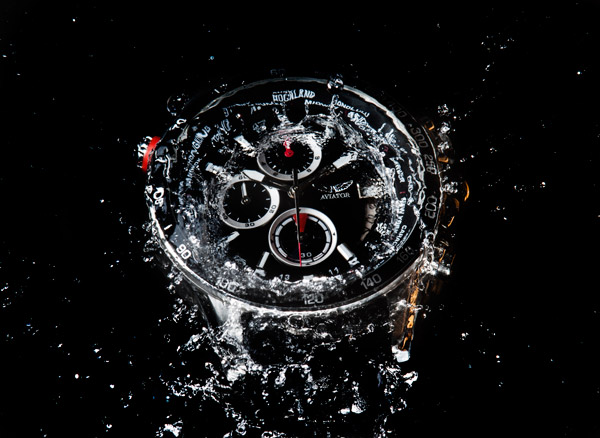
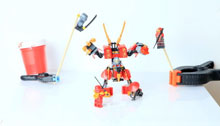
If look at sites like eBay we can see many times sellers who shoot their product in a very simple and novice way.Many times you could bump into a picture that looks like the left picture.Nothing will makeup for the poor picture,as good and popular product it will be.In this tutorial will learn how to make your products look like the picture to the right.

Professional and good looking picture isn’t always a hard job!
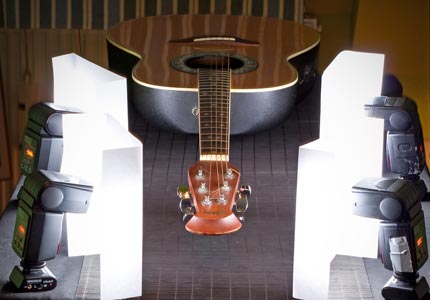
Lets setup the main light.The main light here will be an off camera flash.It can be any brand or any quality,but it will be good if it has manual power control.You don’t have to go for the top of the range flash guns,a 20$ chineese will make the same work.
We put the flash into uor DIY Softbox covered in previouse posts on a regular camera tripod and tried to but as above the camera as we could.Thats how it looks:

Now adjust the power of the main flash to be as fine as you could get by examinig the camera histogram and taking some test photos.
On this set the main light (canon 430EX) was setup to 1/4 power.camera settings: f/18 1/160sec iso 100.Try to stick to this camera settings to get best depth of field and less blury picture.
If you this right you’ll get the following result:a nice background and the top camera will be nicely expozed.

Now it time to use the fill light flash.There are many tricks to put light into the front side of the camera.
- You could use a white reflectror panel that will bring back some of the main flash light to the camera.
- You could use another flash unit in front of the product you are shooting.
- You could also use your on camera flash.
In this case we used another flash unit.Start at a low power fill flash and get up until you see the results you expected.


Here is the process we did:top photo 1/16th power,middle photo 1/4th power bottom photo 1/2th power.
We stopped at 1/2th power as it looked good to us.
Here are the results:


There you go you have your setting,it took about 10 minutes to set it up.
Now its your time to try you ability.Share your photos and comments with as!
Enjoy!!!