
Hi, just wanted to share with you a nice lighting setup I found on the web. This one interested me a lot, not only there is a funny bath plastic duck my 2 years girl plays while having a bath, but also because it used a diy small softbox Continue Reading
Stills Photography
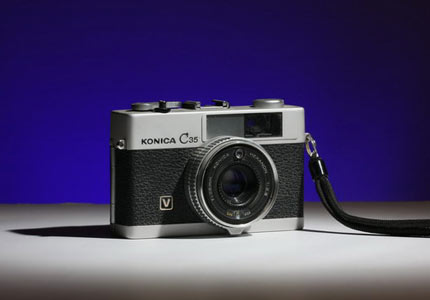
Great and easy product photography setups and ideas.
5 Minutes For Two Flash On Location Product Photography
Hi, recently a friend of mine, who has a beehive (Yep she and her family makes honey for years) , asked me to shot some images of the products they are going to put on sale during the upcoming holiday here in Israel .As I was sure we are going Continue Reading
Two Lights Miniature Photography Home Studio Setup

As I promised in the previous post, I have some new stuff, this time I’m showing a simple setup using two lights. This setup is based on the previous one, you can read here (Dramatic Product Photography using just one light and a grid) while adding a new light to Continue Reading
Dramatic Product Photography using just one light and a grid
Hey, I remmeber a piece at McNielly about using an umbrella over your models head pointet from above just down on him.This makes a very dramatic look to the model (I didn’t found the image that I reffer to as it was on one of his DVDs – recommended) . Continue Reading
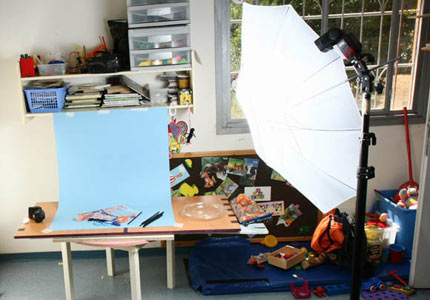
Easy two lights product photography setup
Hey, I’ve been asked by a good friend of mine (Zehavit) to come and shoot some images of their fun science learning packages for children. There are many easy science experiments that the children learn while doing fun things. Those kits are a very useful thing and the childrens love Continue Reading
The easiest product photography setup ever
One of the most popular question on the web, when starting to learn photography is how do improve your product photography. Somehow you don’t have to own an online ebay shop in order to be interested in product photography.It simply a common task to do when you start to explore Continue Reading
Using gels for product photography-Part II
If you read part one of this tutorial about product photography using gel filters, its your time to move forward to part II. In this part we’ll learn how to use the gel filter set and the DIY small flash grid So get in and see how you can take Continue Reading
Adidas Boston -Shoe photography Setup

The one who know me ,that I love running. In this set I’ll show you how I took that shoe product photograph.
Using gels for product photography- part I
Hey, I saw a great tutorial in Stefan’s site (you can get the link in my favorites).He have been shooting products (hand made great looking funny dolls ).Stefan uses a professional studio and pro flashes for his work and you can see the diargrams of some of his studio sessions Continue Reading
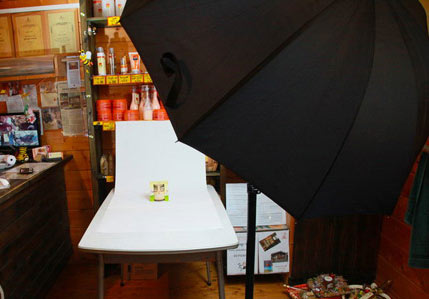
Products photography using a photek brolly
Confirmation Code: GHDCNBF4426301 Hey you guys!in this post I’ll instruct you how to shoot very good shots of your product using just one small camera flash ,in this case I used a Canon 580EXII in a photek brolly which is the most powerful lighting modifier on budget that I know!I Continue Reading
Easy Ebay photography using a light tent
We all know how important it is to get a good picture in order to get a good selling page in your eBay.com store. A good picture will generate more traffic to you store and will probably will get you better conversion rate,that means in simple words MORE MONEY!!! Here Continue Reading
Cookie Photography-the cookie shootout

The cookie post started when I had a newly wed couple that came to my office to get their wedding album.I had to bring some goods in to serve the guys,so I went don’t to the local super market,having only a couple of minutes to choose the best sweet for Continue Reading
How to shoot flowers?
It is not an easy job to photograph a flower.You could use the photosfor many purposes.In case you have an online flowers shop I don’t have to explain the advantages of a good flower photograph.You could use a flower photograph for your greeting cards, I really don’t like the greeting Continue Reading
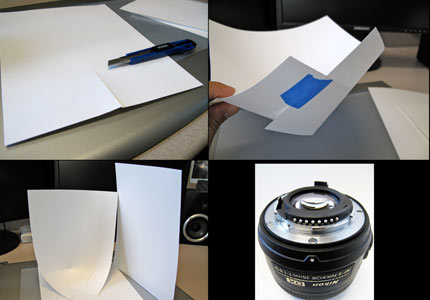
Amazing product photography 1$ technique!-Part II
Great product photographs in no time and priceless look,this is what you are going to learn in this tutorial! If you are not familiar with part I of this tutorial take a look in this link amazing product photography where you’ll get an idea about how I did that setup Continue Reading